

Manage SaaS License
Overview
This guide helps you manage, upgrade, or cancel your Dr Migrate license using the Manage License page in the Dr Migrate Cloud portal (cloud.drmigrate.com).
License and billing are managed in the separate Dr Migrate Cloud portal, not inside the assessment app. The steps below are independent of the in-app navigation.
Who is this for: Admins and Billing Contacts. Time to complete: ~5–10 minutes.
You can view your current license details, modify your subscription, add billing contacts, and cancel or decommission your Dr Migrate instance through the License Information page.
Prerequisites
- Dr Migrate portal access (Admin or Billing Contact)
- Authority to make subscription changes
Responsibilities
- Admins: Responsible for selecting and managing the appropriate license plan.
- Billing Contacts: Receive notifications regarding payment and renewal information.
Viewing License Information in Dr Migrate
Log in to Dr Migrate Portal
Navigate to the Dr Migrate Portal ↗ and log in.
Navigate to Manage License Page
Navigate to the Manage License page for the corresponding Customer Deployment.

Review License Information
Review current and renewal license details under License Information.
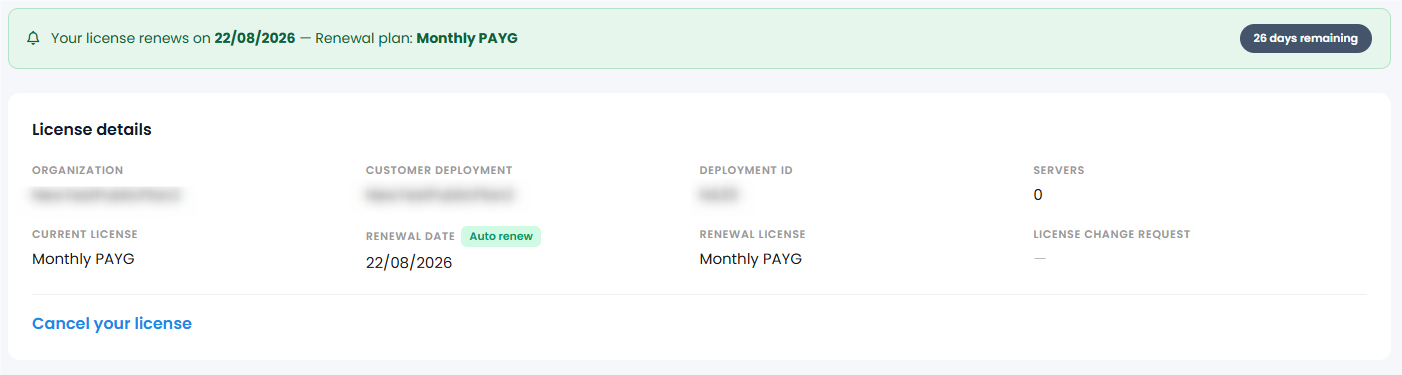
The renewal notification only appears when you have an active license. If your license is inactive or expired, this section will not be shown.
Changing Your License
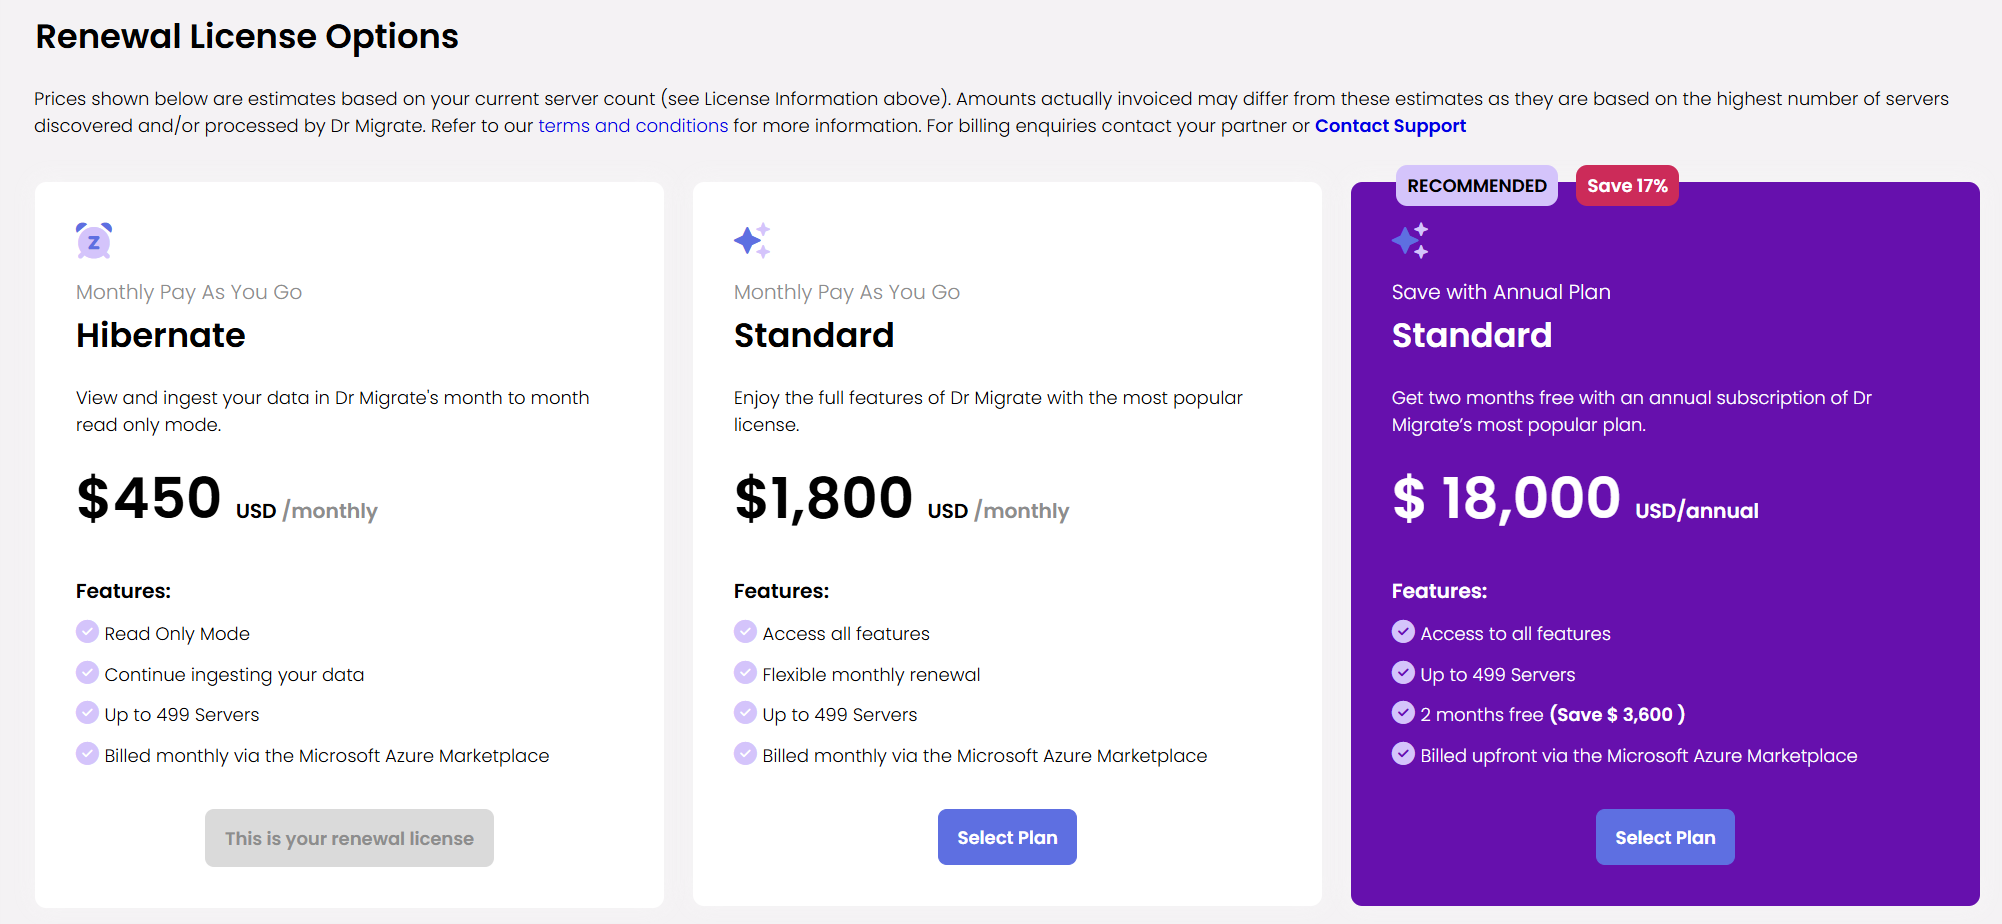
Access Renewal License Options
Navigate to the Renewal License Options at the bottom of the Manage License page.
Select New License Plan
Select the new license plan:
- Hibernate - Pay As You Go, read-only mode to view and ingest your data.
- Monthly - Pay As You Go, full features with flexible monthly renewal.
- Annual - Best Value, full features billed upfront with a discount over paying monthly.
Confirm License Change
A Change Your License modal opens, comparing your current plan against the new plan and the switch-over date. Your current plan stays active and no charges apply before the switch-over date. Tick the two required checkboxes (authority to change the license and acceptance of terms and estimated pricing), then click Continue to review.
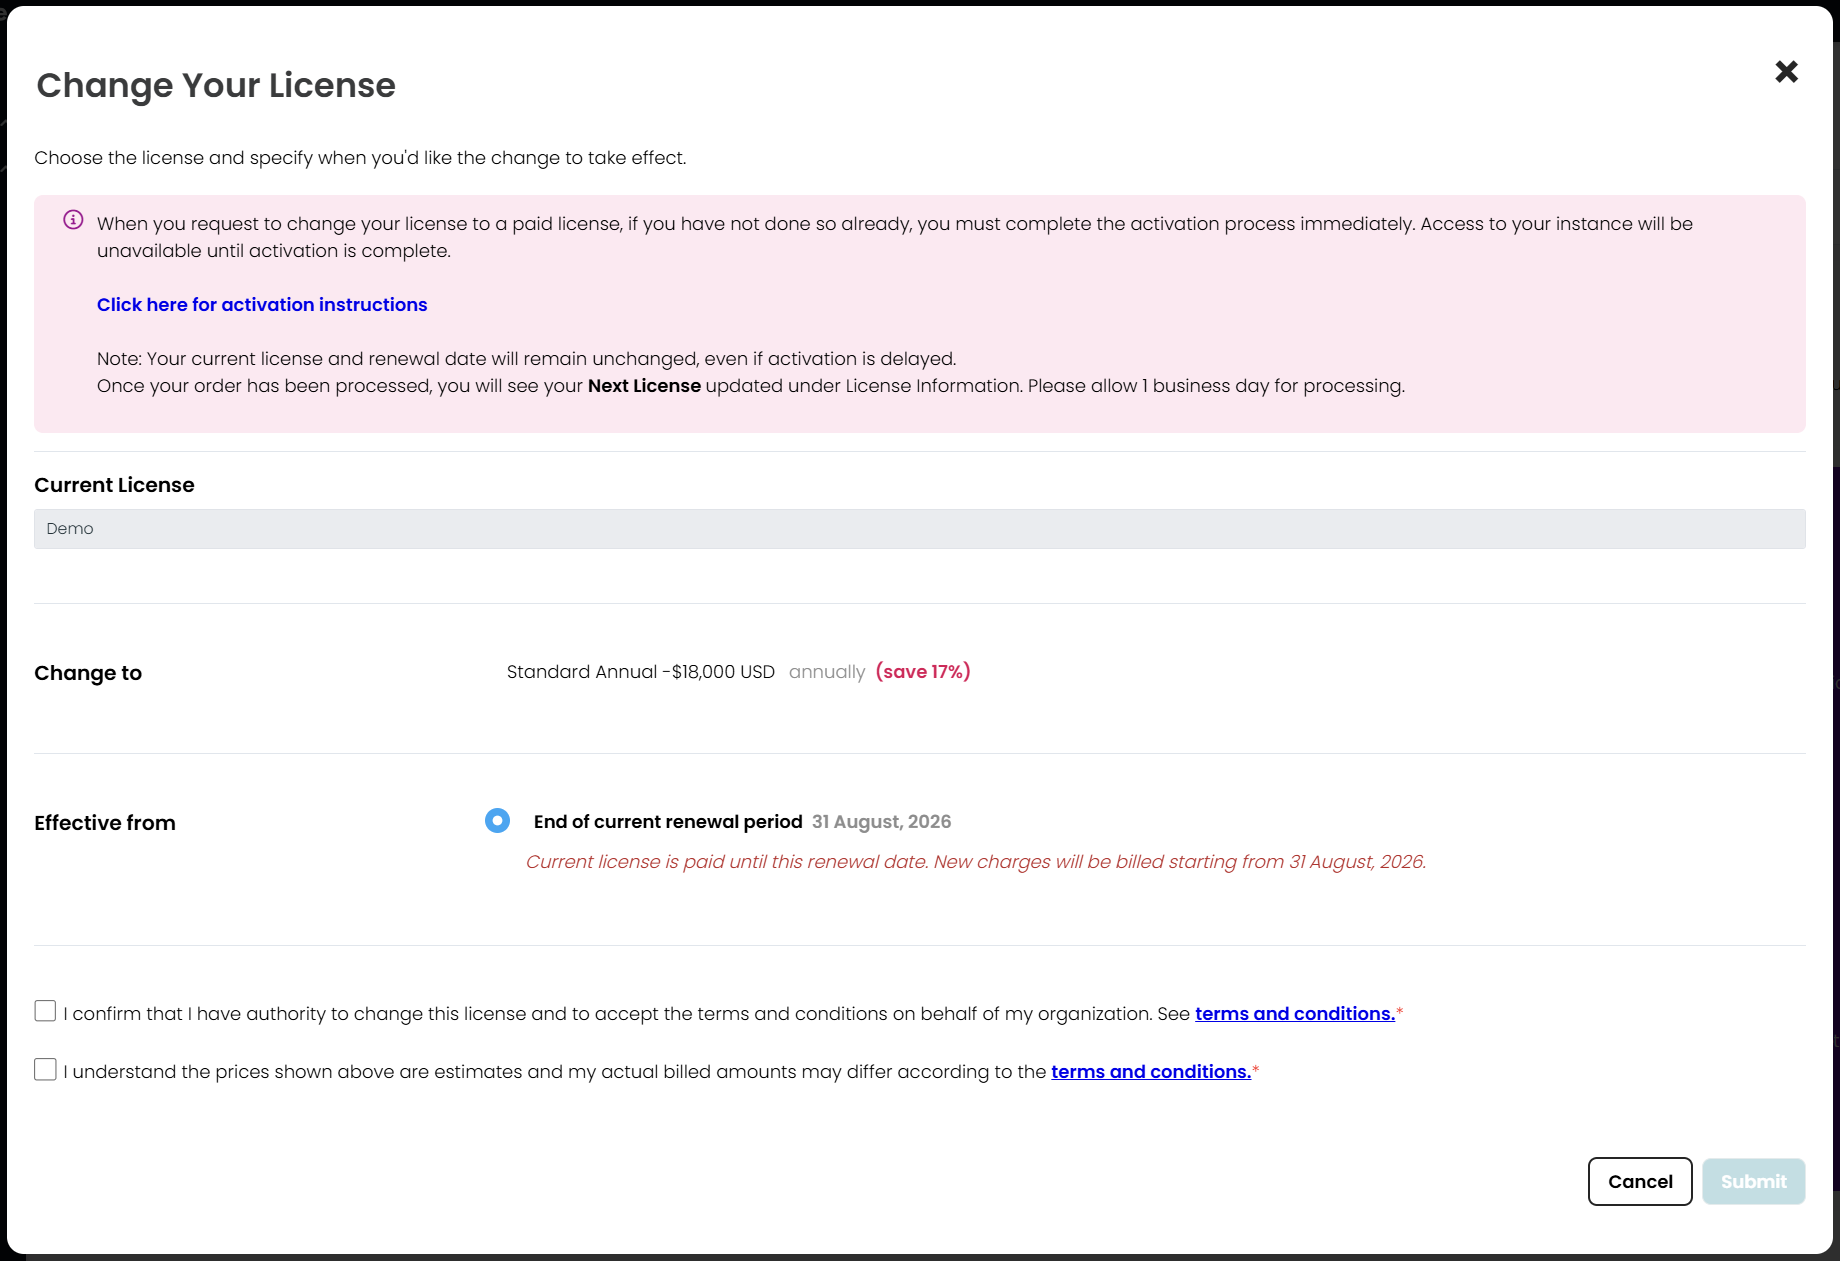
The switch happens automatically on your existing renewal date - there's no option to choose a different effective date.
Complete Reactivation
Confirming your plan change starts the same Subscribe/Configure reactivation flow used for initial activation. Follow the Setup Instance steps on SaaS Plan Setup to complete it - the process and screens are identical, whether you're activating for the first time or changing an existing plan.
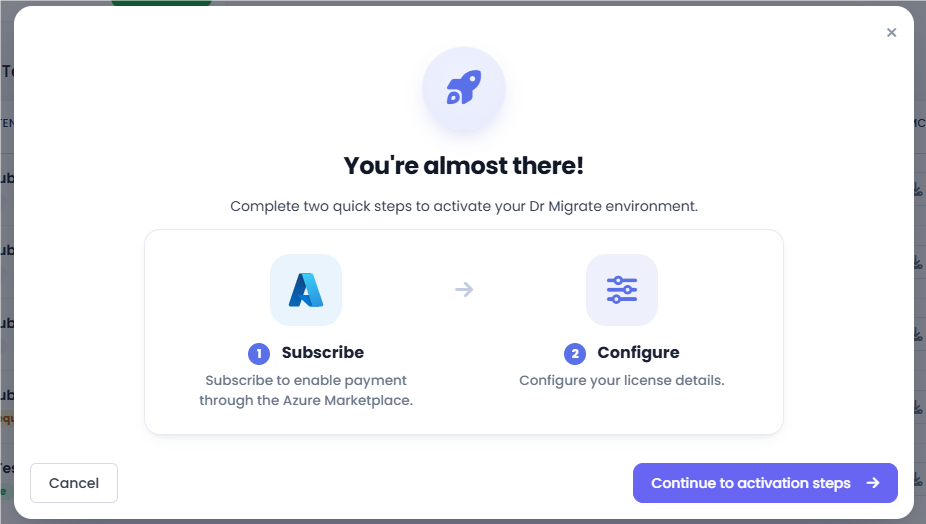
Once finished, a Complete screen confirms your steps are done. Processing can then take up to 1 business day, and you'll receive a confirmation email once your license is ready.
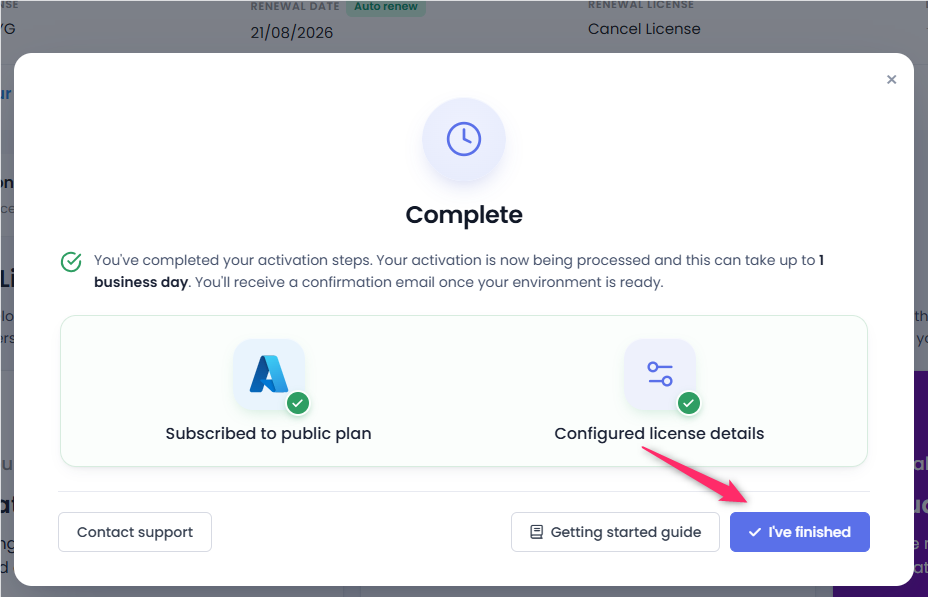
You will need to complete the activation process, if you have not already done so. This is required for continued access to your instance and to set up billing through the Microsoft Azure Marketplace. Your license period will not be extended for any time lost due to delayed activation / lack of access.
If you purchased your licence through an Altra partner: contact them directly for pricing, updates on your request and billing.
Managing Billing Contacts
Review Account Contacts
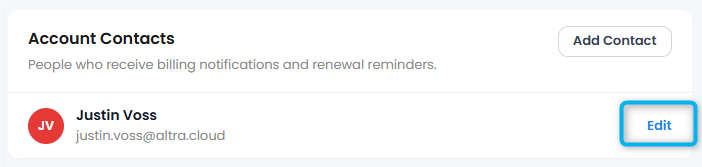
In the Account Contacts section, review who currently receives billing notifications and renewal reminders.
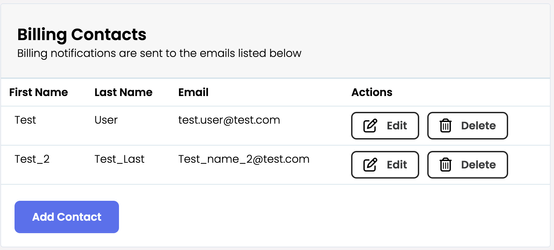
Add a Contact
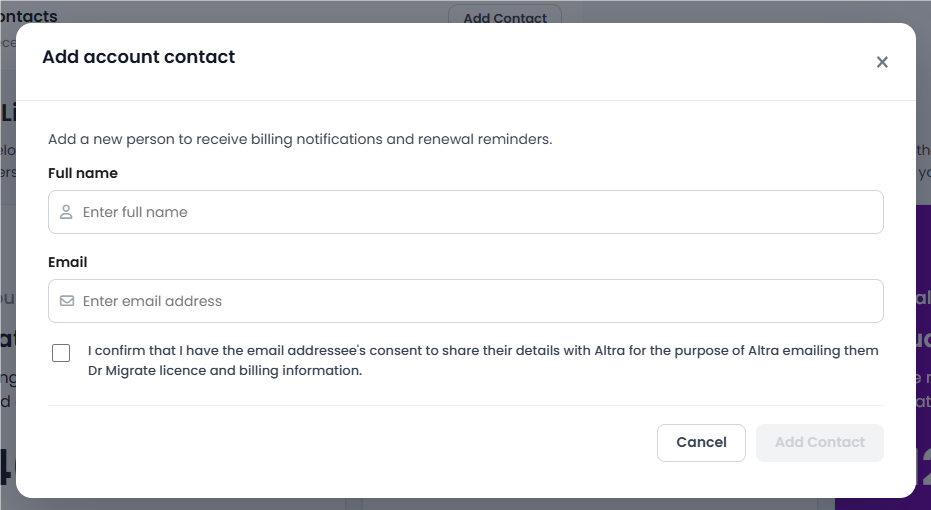
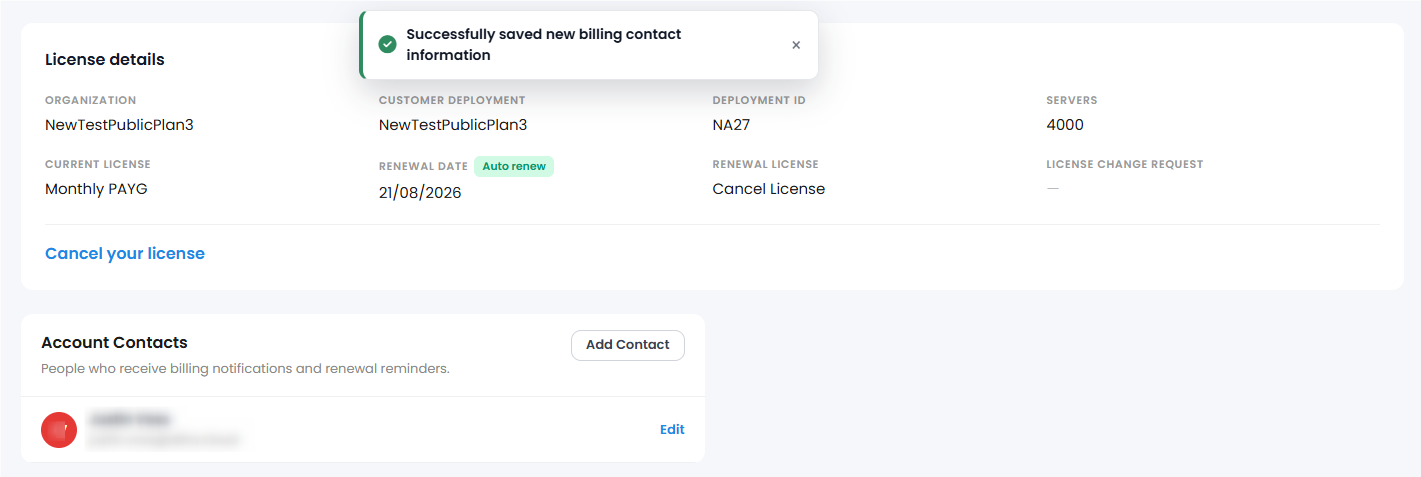
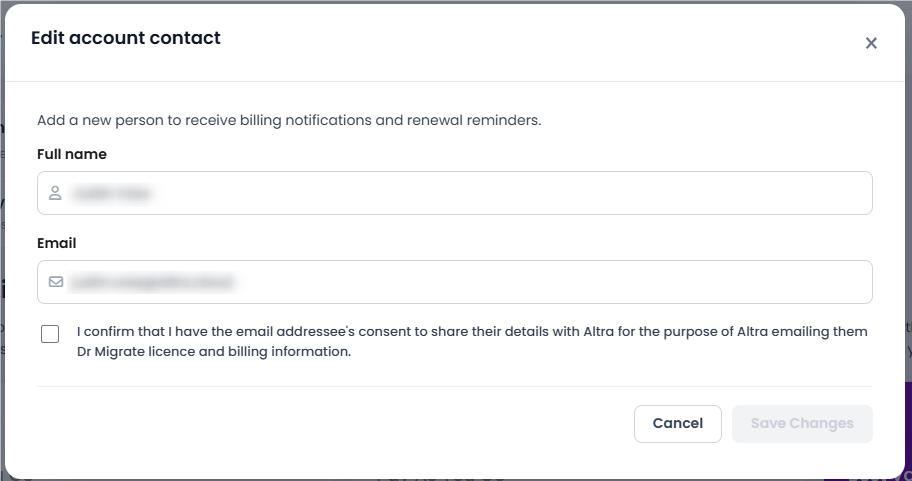
Click Add Contact, enter their Full name and Email, confirm you have the addressee's consent to share their details with Altra for this purpose, then click Add Contact.
Edit Existing Contact
To edit a contact, click the Edit link next to their name and update the information.
Canceling Your License
Navigate to License Information
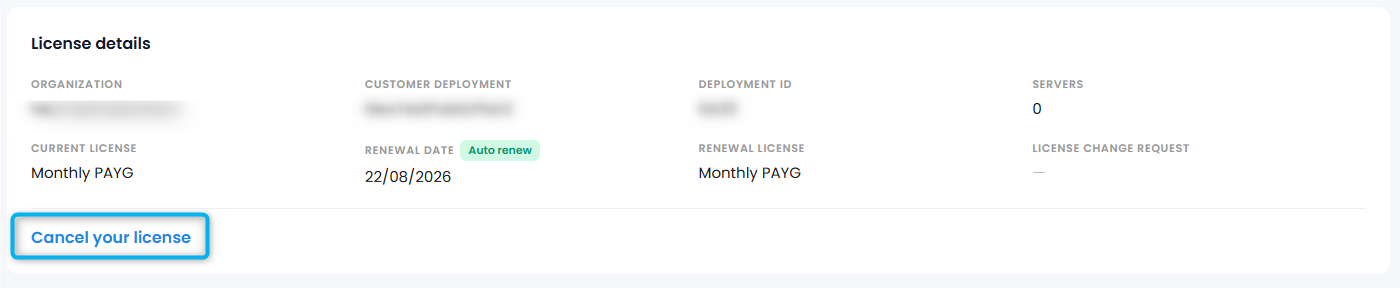
Navigate to your License Information in the Manage License page, and click Cancel your license.
Confirm Cancellation
To confirm license cancellation, review the information about data retention and renewal dates, ensure the confirmation checkbox is checked, then click Apply to finalize the cancellation.
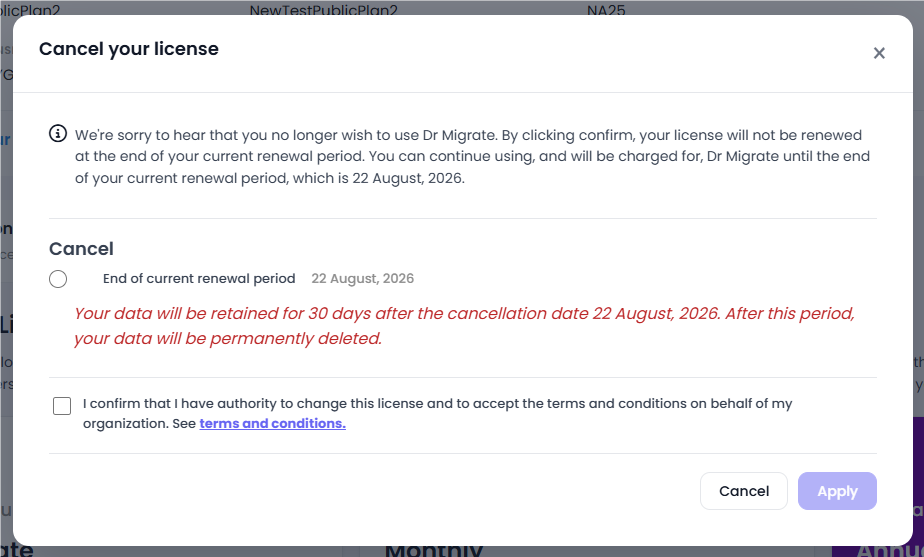
The license will remain active until the end of your current term (see your Renewal Date), after which your data will be permanently deleted within 30 days.
Validate results
- Updated plan appears on License Information
- Billing contacts reflect recent edits
- Cancellation shows a scheduled end-of-term status
Troubleshooting
- Missing Manage License link: ensure you are an Admin or Billing Contact
- Changes not applied: refresh and verify permissions, then retry
- Cancellation not visible: verify the correct Customer Deployment row was selected
Next steps
- If decommissioning: remove Marketplace deployment in Remove Dr Migrate
- Review billing contacts regularly to keep access current