Scan MS SQL
Telemetry Notice: While DMC itself does not perform any external connections, it uses a Microsoft-made component for the MS SQL scans. This tool includes basic telemetry functions used by the Microsoft team for service health review and repair.
No internet access is required, however if the system does have internet access then the MS SQL scan will send non-PII telemetry data to Microsoft-owned services, so you may see connections to their documented Azure Monitor and OneDsCollector addresses.
Pre-Requisites
Prepare Windows Jumpbox VM
Prepare a Windows-based Jumpbox VM with:
- Network access to SQL Server instances you want to assess with the following ports open:
- Port 1433 (TCP) - SQL Server default port (required for default instances)
- Port 1434 (UDP) - SQL Server Browser (required for named instances)
- Custom ports - If SQL Server uses non-default ports, allow those specific TCP ports
- At least 20 GB free disk space
- Administrator privileges (required for Windows Integrated Authentication)
- .NET Runtime 8.0 or above (required for Database Assessment)
Network and Firewall Requirements
DMC requires network connectivity to SQL Server instances on specific ports. Configure your firewall and SQL Server to allow these connections.
Required Ports:
-
Port 1433 (TCP) - SQL Server default port
- Required for connecting to default SQL Server instances
- Used for all SQL Server communication once the connection is established
-
Port 1434 (UDP) - SQL Server Browser
- Required for discovering and connecting to named SQL Server instances
- Used by SQL Server Browser service to identify which port a named instance is using
-
Custom Ports
- If SQL Server is configured to use non-default ports, ensure those specific TCP ports are open in your firewall
SQL Server Requirements:
-
TCP/IP Protocol Enabled: SQL Server must have TCP/IP protocol enabled for remote connections
- Open SQL Server Configuration Manager
- Navigate to: SQL Server Network Configuration → Protocols for [INSTANCE]
- Ensure TCP/IP is enabled
- Restart SQL Server service after enabling
-
SQL Server Browser Service: Required for named instances
- The SQL Server Browser service must be running to discover named instances
- Enable and start the service:
Set-Service -Name SQLBrowser -StartupType Automatic
Start-Service -Name SQLBrowser
Firewall Configuration:
Configure Windows Firewall on both the jumpbox and SQL Server machines to allow SQL Server connections:
# On the SQL Server machine - Allow SQL Server default port
New-NetFirewallRule -DisplayName "SQL Server" -Direction Inbound -Protocol TCP -LocalPort 1433 -Action Allow

# On the SQL Server machine - Allow SQL Server Browser
New-NetFirewallRule -DisplayName "SQL Server Browser" -Direction Inbound -Protocol UDP -LocalPort 1434 -Action Allow1433 in the firewall rule with your custom port number. You can find the port SQL Server is using in SQL Server Configuration Manager under TCP/IP properties → IP Addresses tab.Testing Connectivity:
Before running the assessment, verify network connectivity:
# Test TCP port 1433 connection
Test-NetConnection -ComputerName SQLSERVERNAME -Port 1433

# Test UDP port 1434 (SQL Server Browser)
# Note: Test-NetConnection doesn't support UDP, use telnet or other tools
Windows Account Permissions Requirements
When using Windows Authentication for SQL Server assessment, the Windows account (domain or local) used for authentication must have specific permissions:
On the Jumpbox (where DMC is running):
- The Windows account must have “Log on as a batch job” rights. This is required because DMC runs SqlAssessment.exe as the specified Windows user, which requires this logon type.
On SQL Server:
- The Windows account must have appropriate SQL Server permissions:
- Member of
sysadminserver role, OR - See Least Privilege Account Setup
- Member of
Install .NET Runtime 8.0 or Above (Required)
Database Assessment requires .NET Runtime 8.0 or higher to be installed on your system. The Database Assessment feature requires .NET Runtime version 8.0 or higher to function properly.
Installation Options:
Option 1: Install Before Starting (Recommended)
- Download .NET Runtime 8.0 or later from the official .NET download page
- Run the installer
- Restart your computer if prompted
- Launch DMC and proceed with Database Assessment
Option 2: Install via DMC UI If you select Database Assessment without .NET Runtime installed:
- A modal dialog will appear: ".NET Runtime Required"
- Click “Download .NET Runtime” button (downloads latest .NET 10.0)
- Run the downloaded installer
- Click “Retry” in the modal to continue
- If .NET is not detected after installation, restart DMC for changes to take effect
Verify .Net Installation
- After installation, DMC will automatically detect .NET Runtime
- If not detected, restart DMC to refresh the detection
- The modal will not appear if .NET Runtime 8.0+ is already installed
Complete Infrastructure Scans (Optional but Recommended)
Review Access Requirements
For details, see the System and Access Requirements section.
Run DMC as Administrator
Run DMC.exe from your installation directory as Administrator.
If Running DMC.exe Is Blocked
- Right-click the
.exefile - Select Properties from the context menu
- Under the General tab, look for the Security section
- If you see an Unblock checkbox, tick it
- Click Apply, then OK
Input License Key
Enter the DMC license key you received when downloading DMC.
Select Database Assessment Mode
Click Database Assessment to begin configuring your SQL Server assessment.
If .NET Runtime is Not Installed: If .NET Runtime 8.0 or above is not detected on your system, a modal dialog will appear when you select Database Assessment. The modal provides options to:
- Download .NET Runtime directly from the UI
- Retry detection after installation
- Cancel and install .NET Runtime manually
See the Pre-Requisites section above for detailed installation instructions.
Discover SQL Instances
To automatically discover SQL Server instances, complete at least one VMware or Physical scan first. However, you can also add SQL Server instances manually or via CSV import without running infrastructure scans.
Configure Output Directory and Review Existing Scans
Set Output Directory
Before proceeding with scan configuration, you can specify where scan results will be saved:
- Review Default Location: The default output directory is
C:\temp - Change Directory (optional):
- Click the Browse button next to the output directory field
- Navigate to your desired directory
- Select the folder and click OK
- Verify Path: Confirm the path displayed in the input field is correct
Output Directory Purpose: All scan results, logs, and metadata will be saved to this directory. The path you set here applies to all scan types (VMware, Physical, Database Assessment).
Default Location: If not changed, scans will be saved to C:\temp. You can change this at any time before starting a scan.
Review Existing Scans
The “Existing Scans Found” section displays any previous scan results in the selected output directory:
- If scans are found: You’ll see a count of available scans (e.g., “1 scans found in C:\temp”) and a table listing scan details
- If no scans are found: The section displays “No previous scans found in this directory”
Scan Discovery: Database Assessment can automatically discover SQL Server instances from previous VMware or Physical scans stored in this directory. If you’ve completed infrastructure scans, they will be available for SQL Server discovery.
Scan Management: After completing scans, you can return to this screen to review, export, and manage your scan results. Use the checkboxes to select scans for export, then click “Export Selected Scans” or “Download Offline Report”.
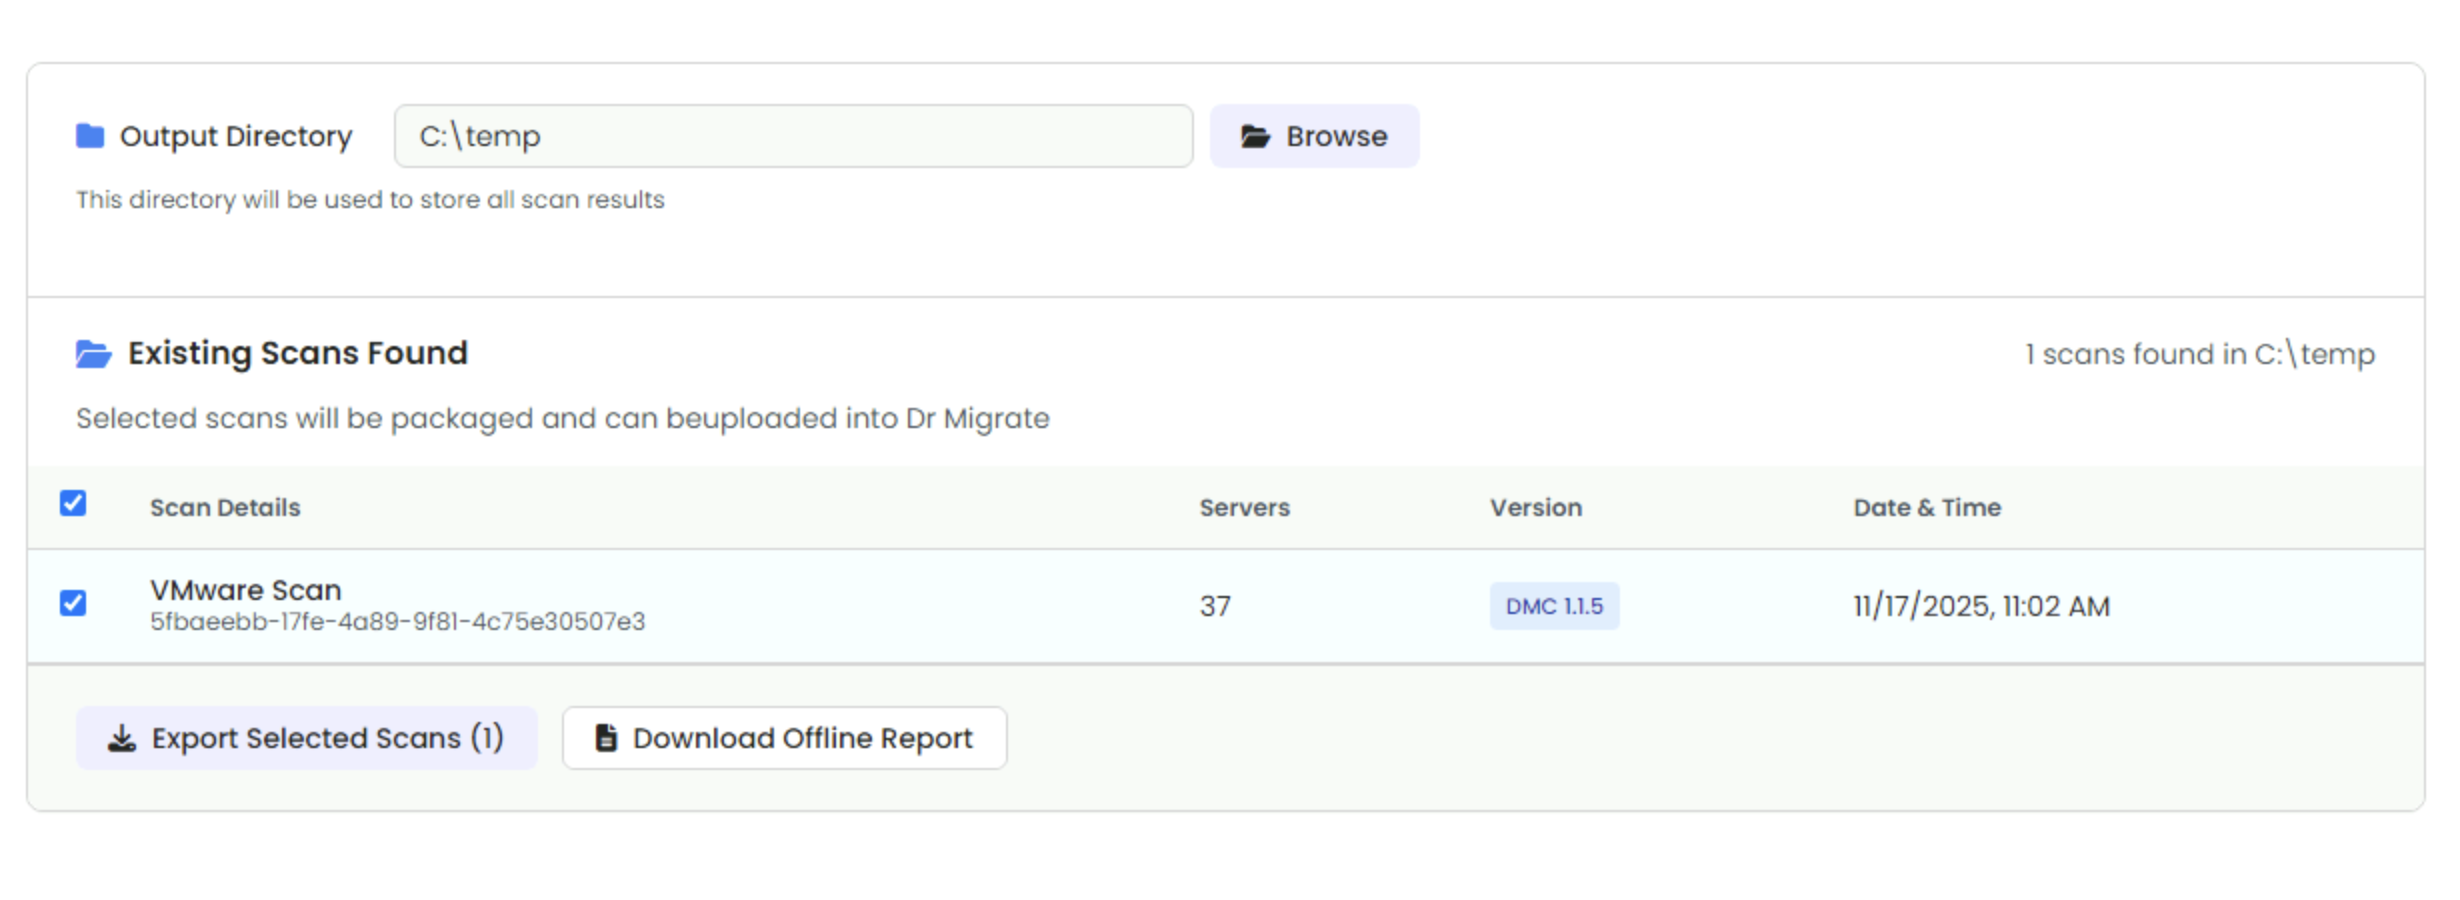
Output Directory and Existing Scans Found sections on the Scan Target Selection screen
SQL Server Discovery
- DMC is specifically designed to allow a customer Administrator to securely utilise their admin credentials for a one-time operation.
- All credentials are stored in memory only and never persist beyond execution.
- Credential requirements are tailored for one-time use, allowing administrators to securely employ their personal credentials.
The first step is to identify which SQL Server instances you want to assess. A SQL Server instance is a single installation of SQL Server on a server. A server can have multiple instances (for example, a default instance and named instances like SQLEXPRESS).
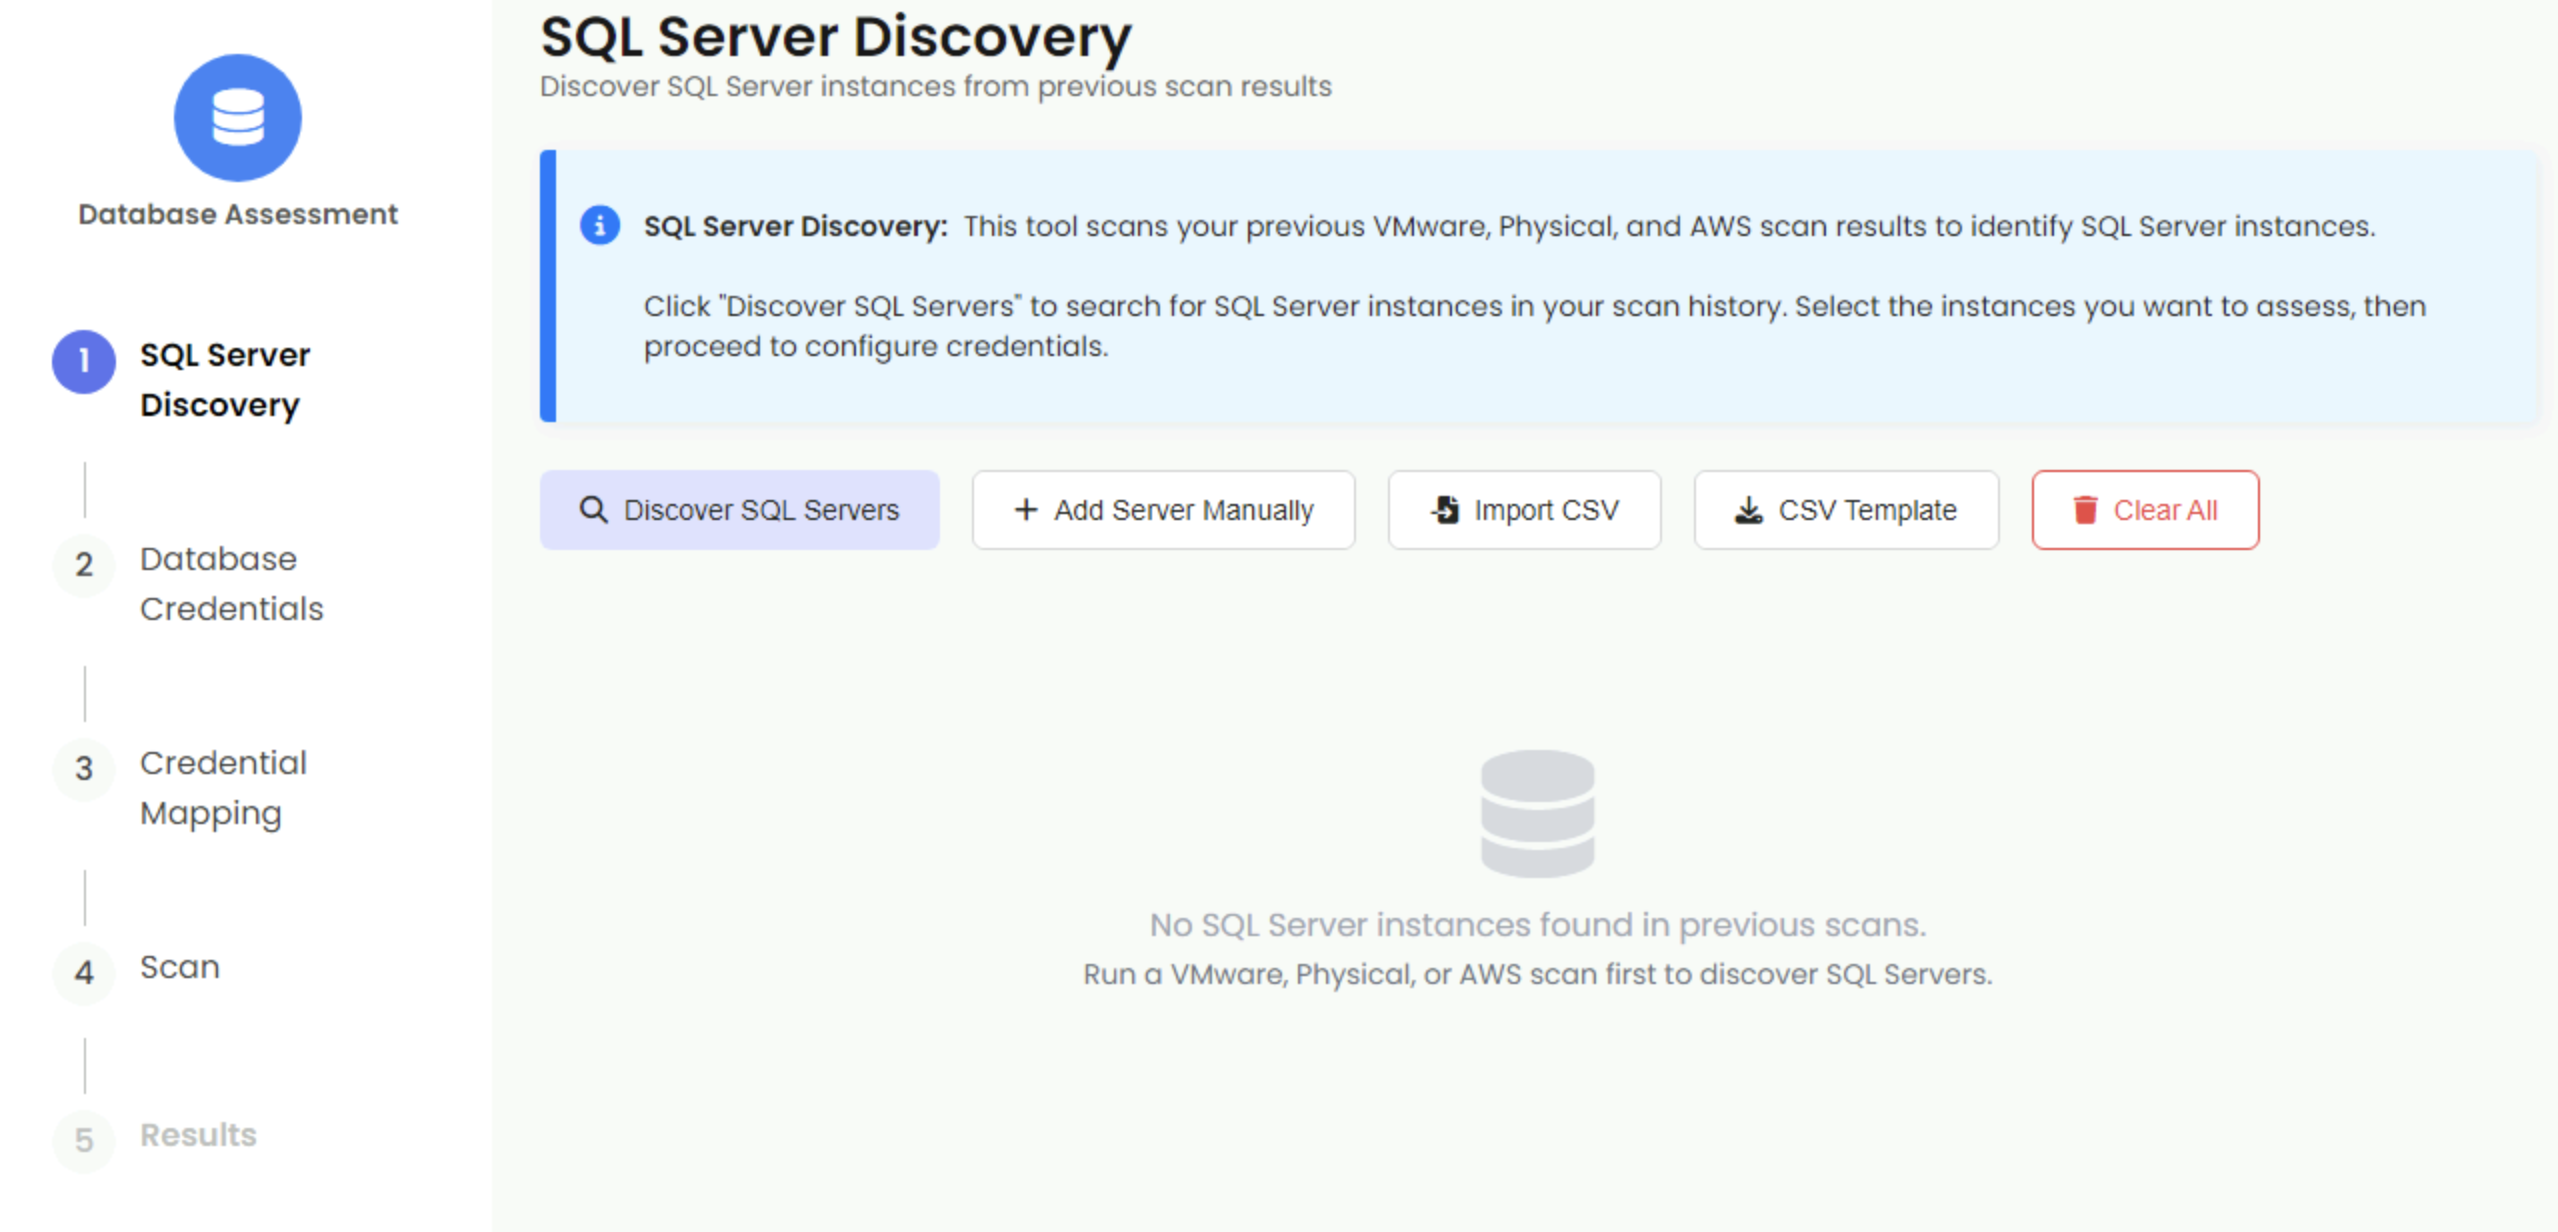
SQL Server Discovery interface
Discover SQL Servers
DMC provides three options for discovering SQL Server instances. Select one of the tabs below to see instructions for your chosen method:
Discover from Previous Scans (Recommended)
DMC automatically scans your previous VMware and Physical scan results to find SQL Server instances.
Steps:
- Click Discover SQL Servers button
- DMC searches through all previous scan folders in your output directory
- SQL Server instances discovered during infrastructure scans are automatically loaded
- Review the discovered servers in the table
- Select the instances you want to assess using checkboxes
DMC reads SQL Server information from previous scan results. When you click “Discover SQL Servers”, DMC searches through VMware and Physical scan results in your output directory. If you haven’t run any VMware or Physical scans yet, you can still add SQL Server instances manually or via CSV import (see other tabs above).
Note: When you click “Discover SQL Servers”, you may see one of two messages:
- “No previous scans found” This appears when no scan folders exist in your output directory. In this case, use the other tabs to add servers manually.
- “No SQL Server instances found” This appears when scan folders exist but no SQL Server instances were discovered in those scans. You can still use the other tabs to add servers manually.
Add Servers Manually
If you need to assess SQL Server instances that weren’t discovered in previous scans, you can add them manually.
Steps:
- Click Add Server Manually button
- Enter the Hostname (required) - server name or IP address (e.g.,
WIN2019SRV2or192.168.1.100) - Enter the Instance Name (optional) - SQL Server instance name (e.g.,
SQLEXPRESS). Leave blank for default instance - Enter Edition (optional) - e.g., “Express Edition”
- Enter Version (optional) - e.g., “15.0.2000.5”
- Click Add Server
Import from CSV
For bulk import of SQL Server instances, use the CSV import feature.
Steps:
- Click CSV Template to download a template file
- Fill in the CSV with your SQL Server information:
hostname,instance,edition,version WIN2019SRV2,SQLEXPRESS,Express Edition,15.0.2000.5 SQLSERVER01,,Standard Edition,14.0.1000.169 - Click Import CSV
- Select your CSV file
- Servers are imported and added to the list
CSV Format:
- hostname (required): Server name or IP address
- instance (optional): Instance name (leave blank for default)
- edition (optional): SQL Server edition
- version (optional): SQL Server version
Select Servers for Assessment
After discovering or adding SQL Server instances:
- Review the list of SQL Server instances
- Use checkboxes to select which instances you want to assess
- Use the search box to filter servers if you have many instances
- Use pagination controls if you have more than 10 servers
Click Next when you have selected the SQL Server instances you want to assess.
Database Credentials
Now add SQL Server authentication credentials that will be used to connect to the SQL Server instances you selected.
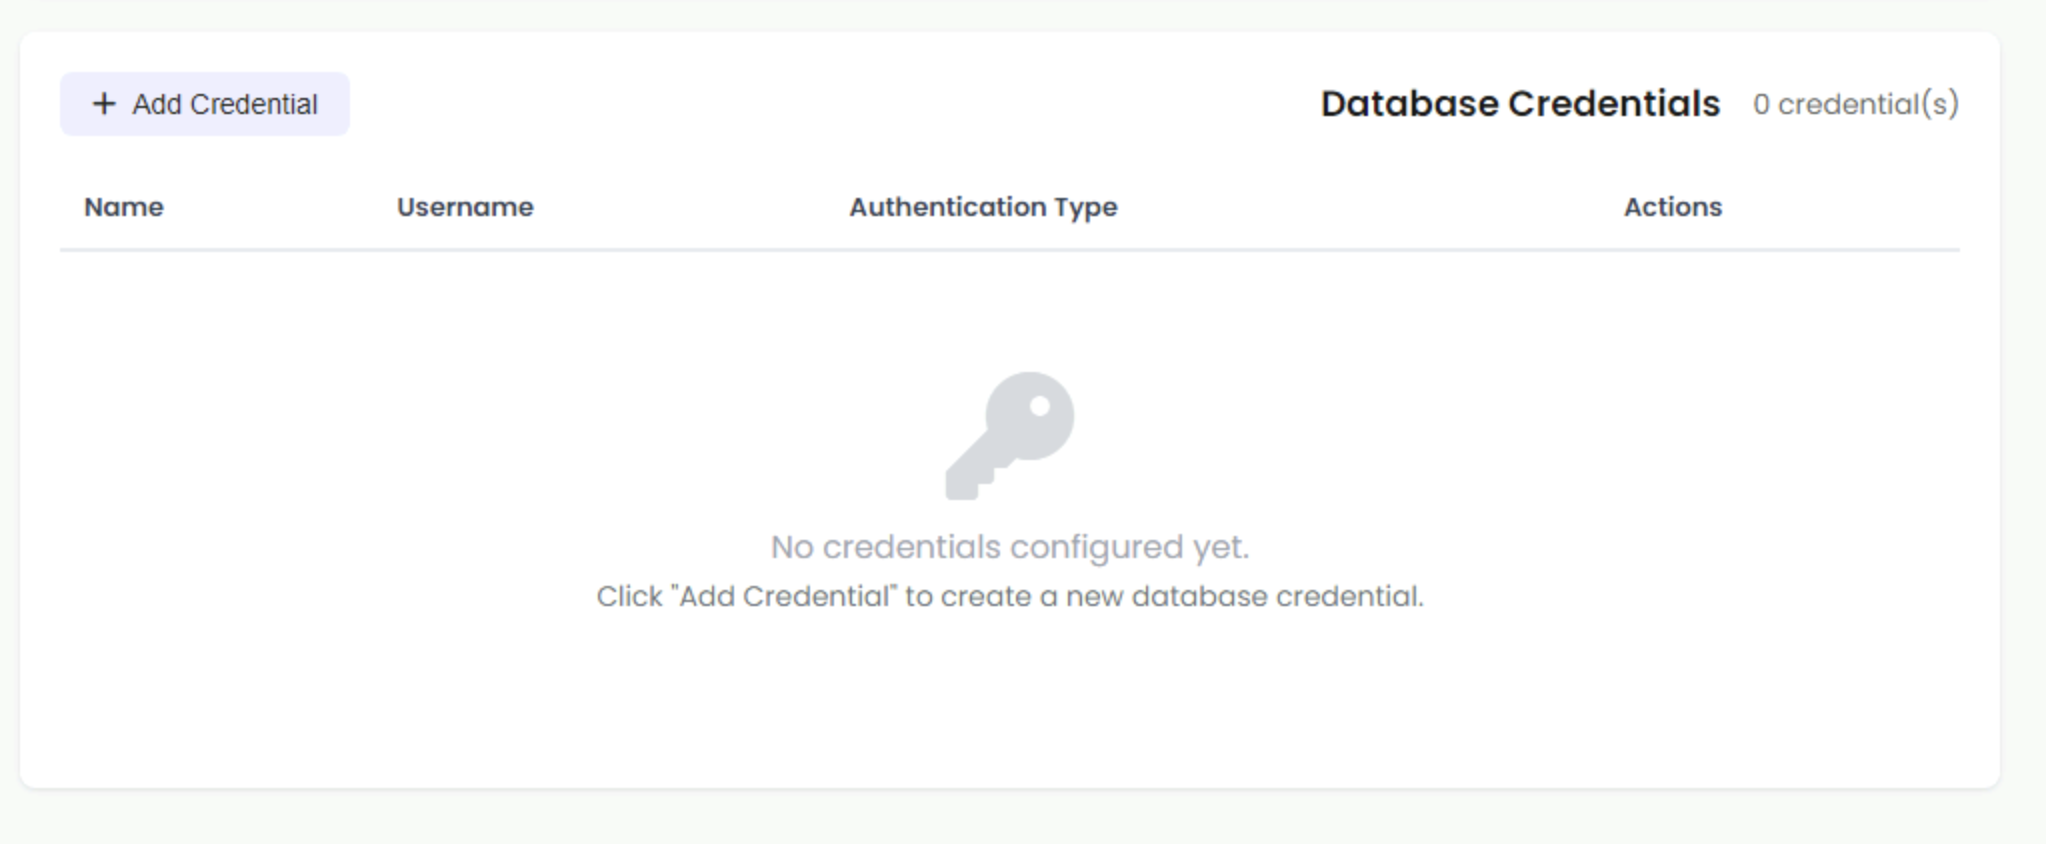
Database Credentials interface
DMC supports three authentication methods for connecting to SQL Server:
\) in the username automatically indicates Windows Authentication. If there’s no backslash, DMC uses SQL Server Authentication.Windows Authentication (Domain)
Uses Active Directory domain accounts to authenticate to SQL Server.
Required Permissions:
The domain account must have specific permissions before it can be used for SQL assessment:
-
“Log on as a batch job” rights on the jumpbox:
- The domain account must be granted “Log on as a batch job” rights on the Windows jumpbox where DMC is running
- This is required because DMC starts SqlAssessment.exe as the specified domain user, which requires batch logon type
- This is separate from administrator privileges
-
SQL Server permissions:
- The domain account must have appropriate permissions on the SQL Server instances
- Recommended: Member of
sysadminserver role - Alternative: Custom account with minimum permissions, see Least Privilege Account Setup
Granting “Log on as a batch job” Rights:
You can grant this right using one of the following methods:
Method 1: Using Group Policy Editor (GUI)
- On the jumpbox, open
gpedit.msc(Local Group Policy Editor) - Navigate to: Computer Configuration → Windows Settings → Security Settings → Local Policies → User Rights Assignment
- Find “Log on as a batch job” policy
- Double-click to open the policy properties
- Click “Add User or Group” and add the domain account
- Click OK to save
Method 2: Using Command Line (PowerShell as Administrator)
# Grant "Log on as a batch job" right to a domain account
$user = "DOMAIN\username"  # Replace with your domain account
$tempPath = [System.IO.Path]::GetTempFileName()
secedit /export /cfg $tempPath
$content = Get-Content $tempPath
if ($content -notmatch "SeBatchLogonRight\s*=\s*.*$user") {
    if ($content -match "SeBatchLogonRight\s*=") {
        $content = $content -replace "(SeBatchLogonRight\s*=\s*)(.*)", "`$1`$2,$user"
    } else {
        $content += "`nSeBatchLogonRight = $user"
    }
    Set-Content -Path $tempPath -Value $content
    secedit /configure /db "$env:windir\security\local.sdb" /cfg $tempPath
}
Remove-Item $tempPath
Method 3: Using secpol.msc (Local Security Policy)
- On the jumpbox, open
secpol.msc(Local Security Policy) - Navigate to: Local Policies → User Rights Assignment
- Find “Log on as a batch job”
- Double-click and add the domain account
- Click OK to save
Username Format:
- Format:
DOMAIN\username - Examples:
contoso\sqladmin,MYDOMAIN\dbuser
Use this for:
- Active Directory domain accounts with SQL Server access
- DMC will execute the assessment using the specified domain credentials
Steps:
- Click Add Credential button
- Enter a Credential Name (e.g., “Production SQL Admin”)
- Enter the Username in the format
DOMAIN\username(e.g.,contoso\sqladmin) - Enter the Password for the Windows domain account
- Click Save Credential
Windows Authentication (Local Machine)
Uses local Windows accounts on the SQL Server machine to authenticate to SQL Server.
Required Permissions:
The local account must have specific permissions before it can be used for SQL assessment:
-
“Log on as a batch job” rights on the jumpbox:
- The local account must be granted “Log on as a batch job” rights on the Windows jumpbox where DMC is running
- This is required because DMC starts SqlAssessment.exe as the specified local user, which requires batch logon type
- This is separate from administrator privileges
-
SQL Server permissions:
- The local account must have appropriate permissions on the SQL Server instances
- Recommended: Member of
sysadminserver role - Alternative: Custom account with minimum permissions, see Least Privilege Account Setup
Granting “Log on as a batch job” Rights:
You can grant this right using one of the following methods:
Method 1: Using Group Policy Editor (GUI)
- On the jumpbox, open
gpedit.msc(Local Group Policy Editor) - Navigate to: Computer Configuration → Windows Settings → Security Settings → Local Policies → User Rights Assignment
- Find “Log on as a batch job” policy
- Double-click to open the policy properties
- Click “Add User or Group” and add the local account (format:
.\usernameorSERVERNAME\username) - Click OK to save
Method 2: Using Command Line (PowerShell as Administrator)
# Grant "Log on as a batch job" right to a local account
$user = ".\username"  # Or use "SERVERNAME\username" - Replace with your local account
$tempPath = [System.IO.Path]::GetTempFileName()
secedit /export /cfg $tempPath
$content = Get-Content $tempPath
if ($content -notmatch "SeBatchLogonRight\s*=\s*.*$user") {
    if ($content -match "SeBatchLogonRight\s*=") {
        $content = $content -replace "(SeBatchLogonRight\s*=\s*)(.*)", "`$1`$2,$user"
    } else {
        $content += "`nSeBatchLogonRight = $user"
    }
    Set-Content -Path $tempPath -Value $content
    secedit /configure /db "$env:windir\security\local.sdb" /cfg $tempPath
}
Remove-Item $tempPath
Method 3: Using secpol.msc (Local Security Policy)
- On the jumpbox, open
secpol.msc(Local Security Policy) - Navigate to: Local Policies → User Rights Assignment
- Find “Log on as a batch job”
- Double-click and add the local account (format:
.\usernameorSERVERNAME\username) - Click OK to save
Username Format:
- Format:
.\usernameorSERVERNAME\username - Examples:
.\Administrator,.\SQLAdmin,SERVERNAME\dbuser
Use this for:
- Local Windows accounts on the SQL Server machine
- DMC will execute the assessment using the specified local machine credentials
Steps:
- Click Add Credential button
- Enter a Credential Name (e.g., “Local SQL Admin”)
- Enter the Username in the format
.\usernameorSERVERNAME\username(e.g.,.\Administrator) - Enter the Password for the local Windows account
- Click Save Credential
SQL Server Authentication
Uses SQL Server native logins (username and password) to authenticate directly to SQL Server.
Username Format:
- Format:
username(no backslash) - Examples:
sa,sqluser,dmauser
Use this for:
- SQL Server native logins
- Credentials are passed directly to SQL Server for authentication
Steps:
- Click Add Credential button
- Enter a Credential Name (e.g., “SQL Login”)
- Enter the Username (SQL Server login name, no backslash)
- Enter the Password for the SQL Server login
- Click Save Credential
Manage Credentials
After adding credentials, they appear in the Database Credentials table. The table displays:
- Name - The friendly name you assigned to the credential
- Username - The username format (shows domain\username for Windows Auth, or plain username for SQL Auth)
- Authentication Type - Displays the authentication method as a colored tag:
- Windows Authentication (Domain or Local Machine)
- SQL Authentication
- Actions - Edit and Delete buttons for each credential
Managing Credentials:
- Edit credentials by clicking the edit icon (pencil button) - modify the credential name, username, or password
- Delete credentials by clicking the delete icon (trash button) - remove credentials you no longer need
- View all configured credentials in the table - see a count of credentials (e.g., “1 credential(s)”)
Click Next when you have added the credentials you need.
Credential Mapping
Map the credentials you created to each SQL Server instance you want to assess.
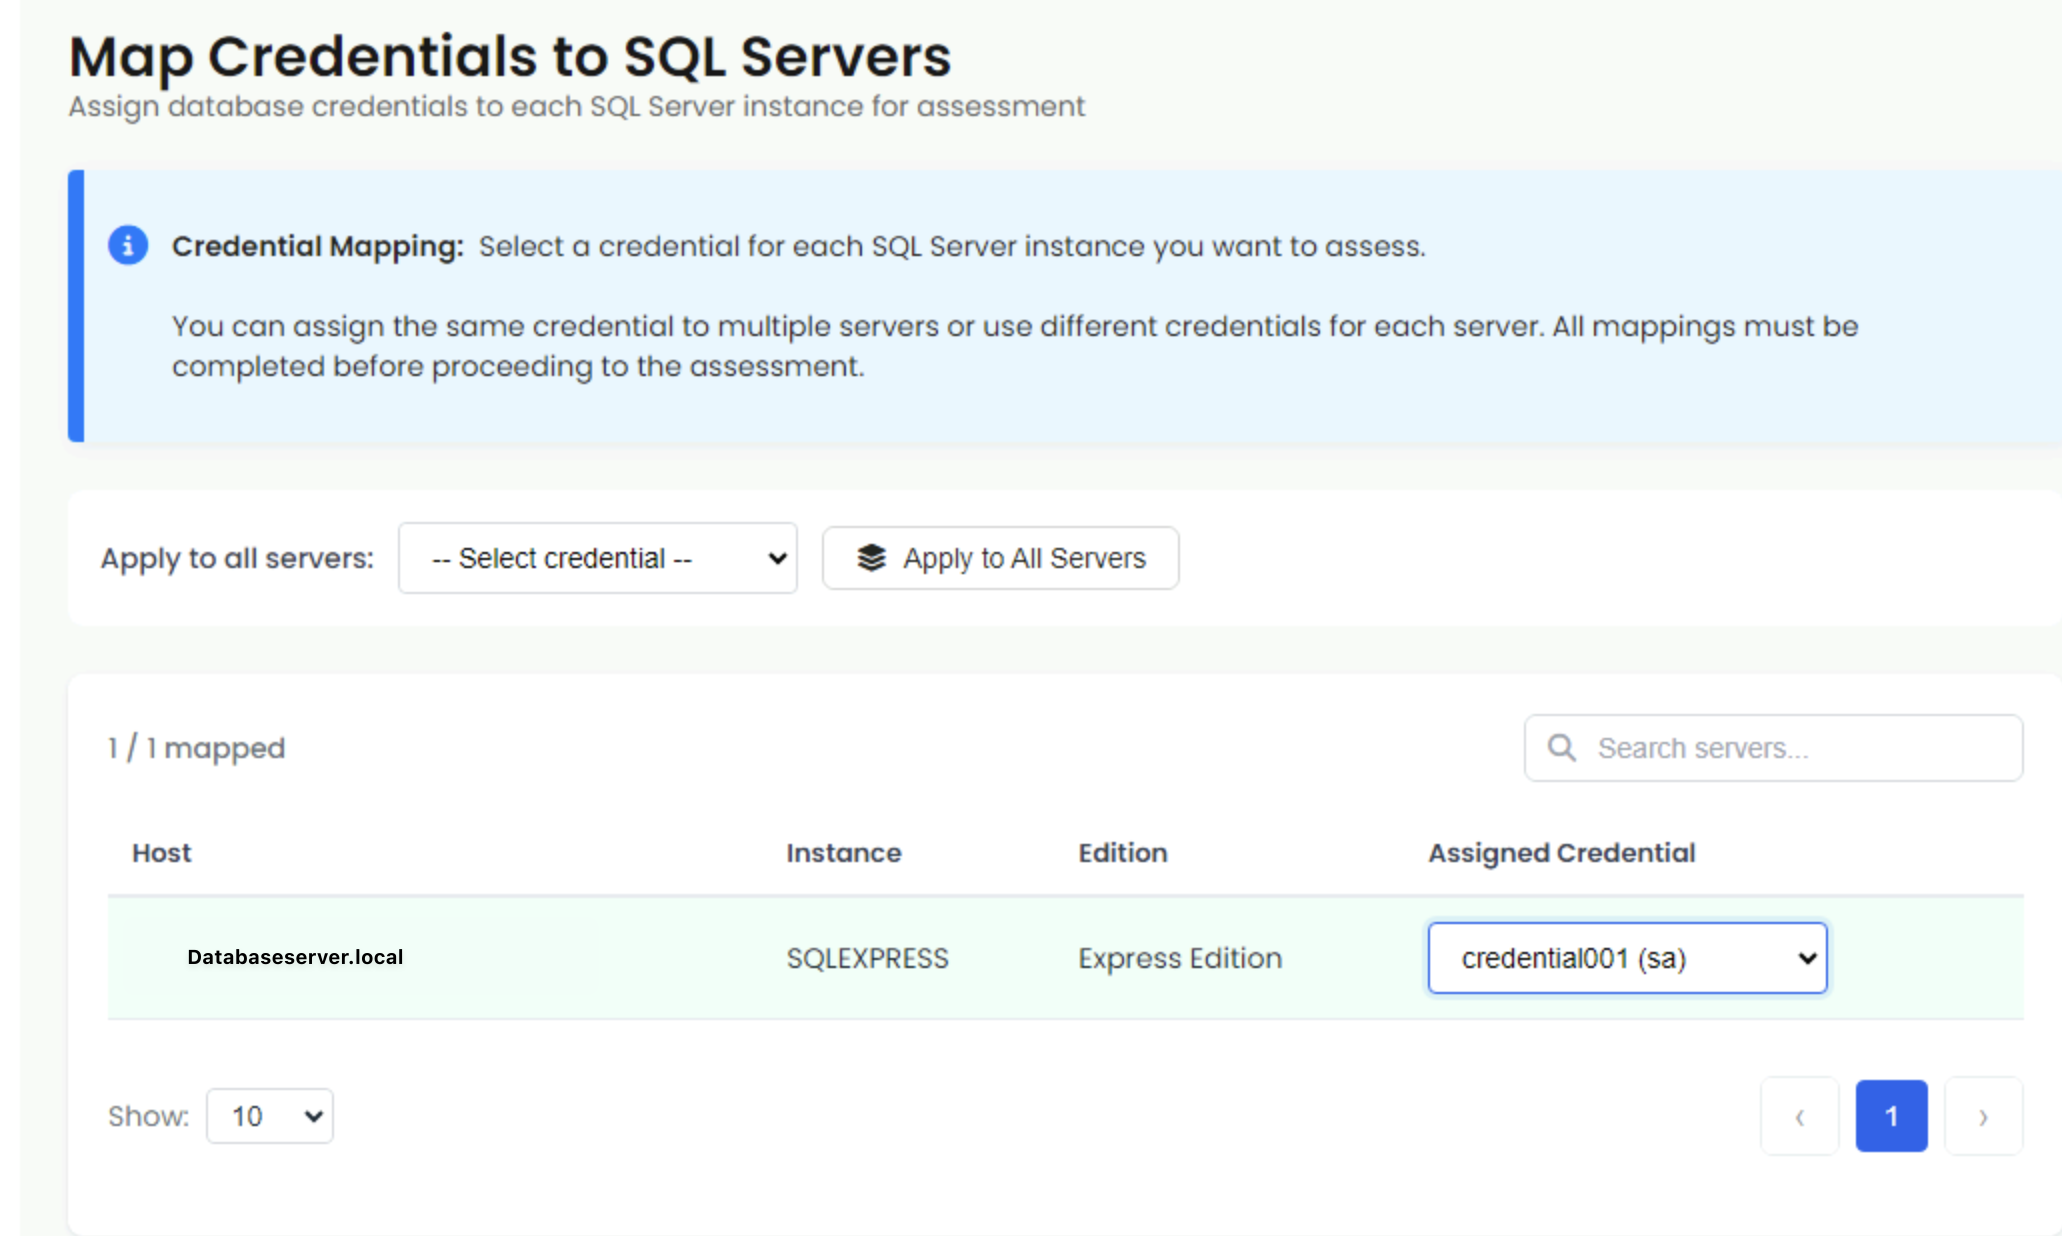
Credential Mapping interface
Map Credentials to Servers
The credential mapping screen displays all SQL Server instances you selected for assessment. Each instance must have a credential assigned before you can proceed.
Understanding the Screen:
- The status indicator at the top shows how many servers have been mapped (e.g., “0/2 mapped”) and updates automatically as you assign credentials
- Each row in the table shows a checkmark (✓) when a credential is assigned, or a warning (⚠) when no credential is assigned
- Dropdown menus list all credentials you’ve added in the previous step, showing the credential name and authentication type for easy selection
DMC provides two methods for mapping credentials. Select one of the tabs below to see instructions for your chosen method:
Bulk Mapping (Recommended for Multiple Servers)
Use this method when most or all servers use the same credential:
- Locate the “Apply to all servers:” dropdown at the top of the server list
- Click the dropdown (it will initially show “– Select credential –”)
- Select a credential from the dropdown list
- Click the Apply to All Servers button (with database icon) to assign the selected credential to all SQL Server instances at once
- Review the table and adjust individual mappings as needed if some servers require different credentials
Individual Mapping
Use this method when servers require different credentials:
- Review the list of SQL Server instances in the table
- For each server, locate the dropdown in the Assigned Credential column
- Click the dropdown and select the appropriate credential
- Repeat for each server that needs a different credential
Search and Filter
- Use the search box to filter servers by hostname, instance name, or edition
- Use pagination controls if you have many servers
Click Next when all SQL Server instances have credentials assigned.
Scan
Now that you have configured SQL Server instances and credentials, you can run the assessment.
Review Assessment Summary
Before starting the scan, review the summary information displayed on the scan screen:
Database Assessment scan interface
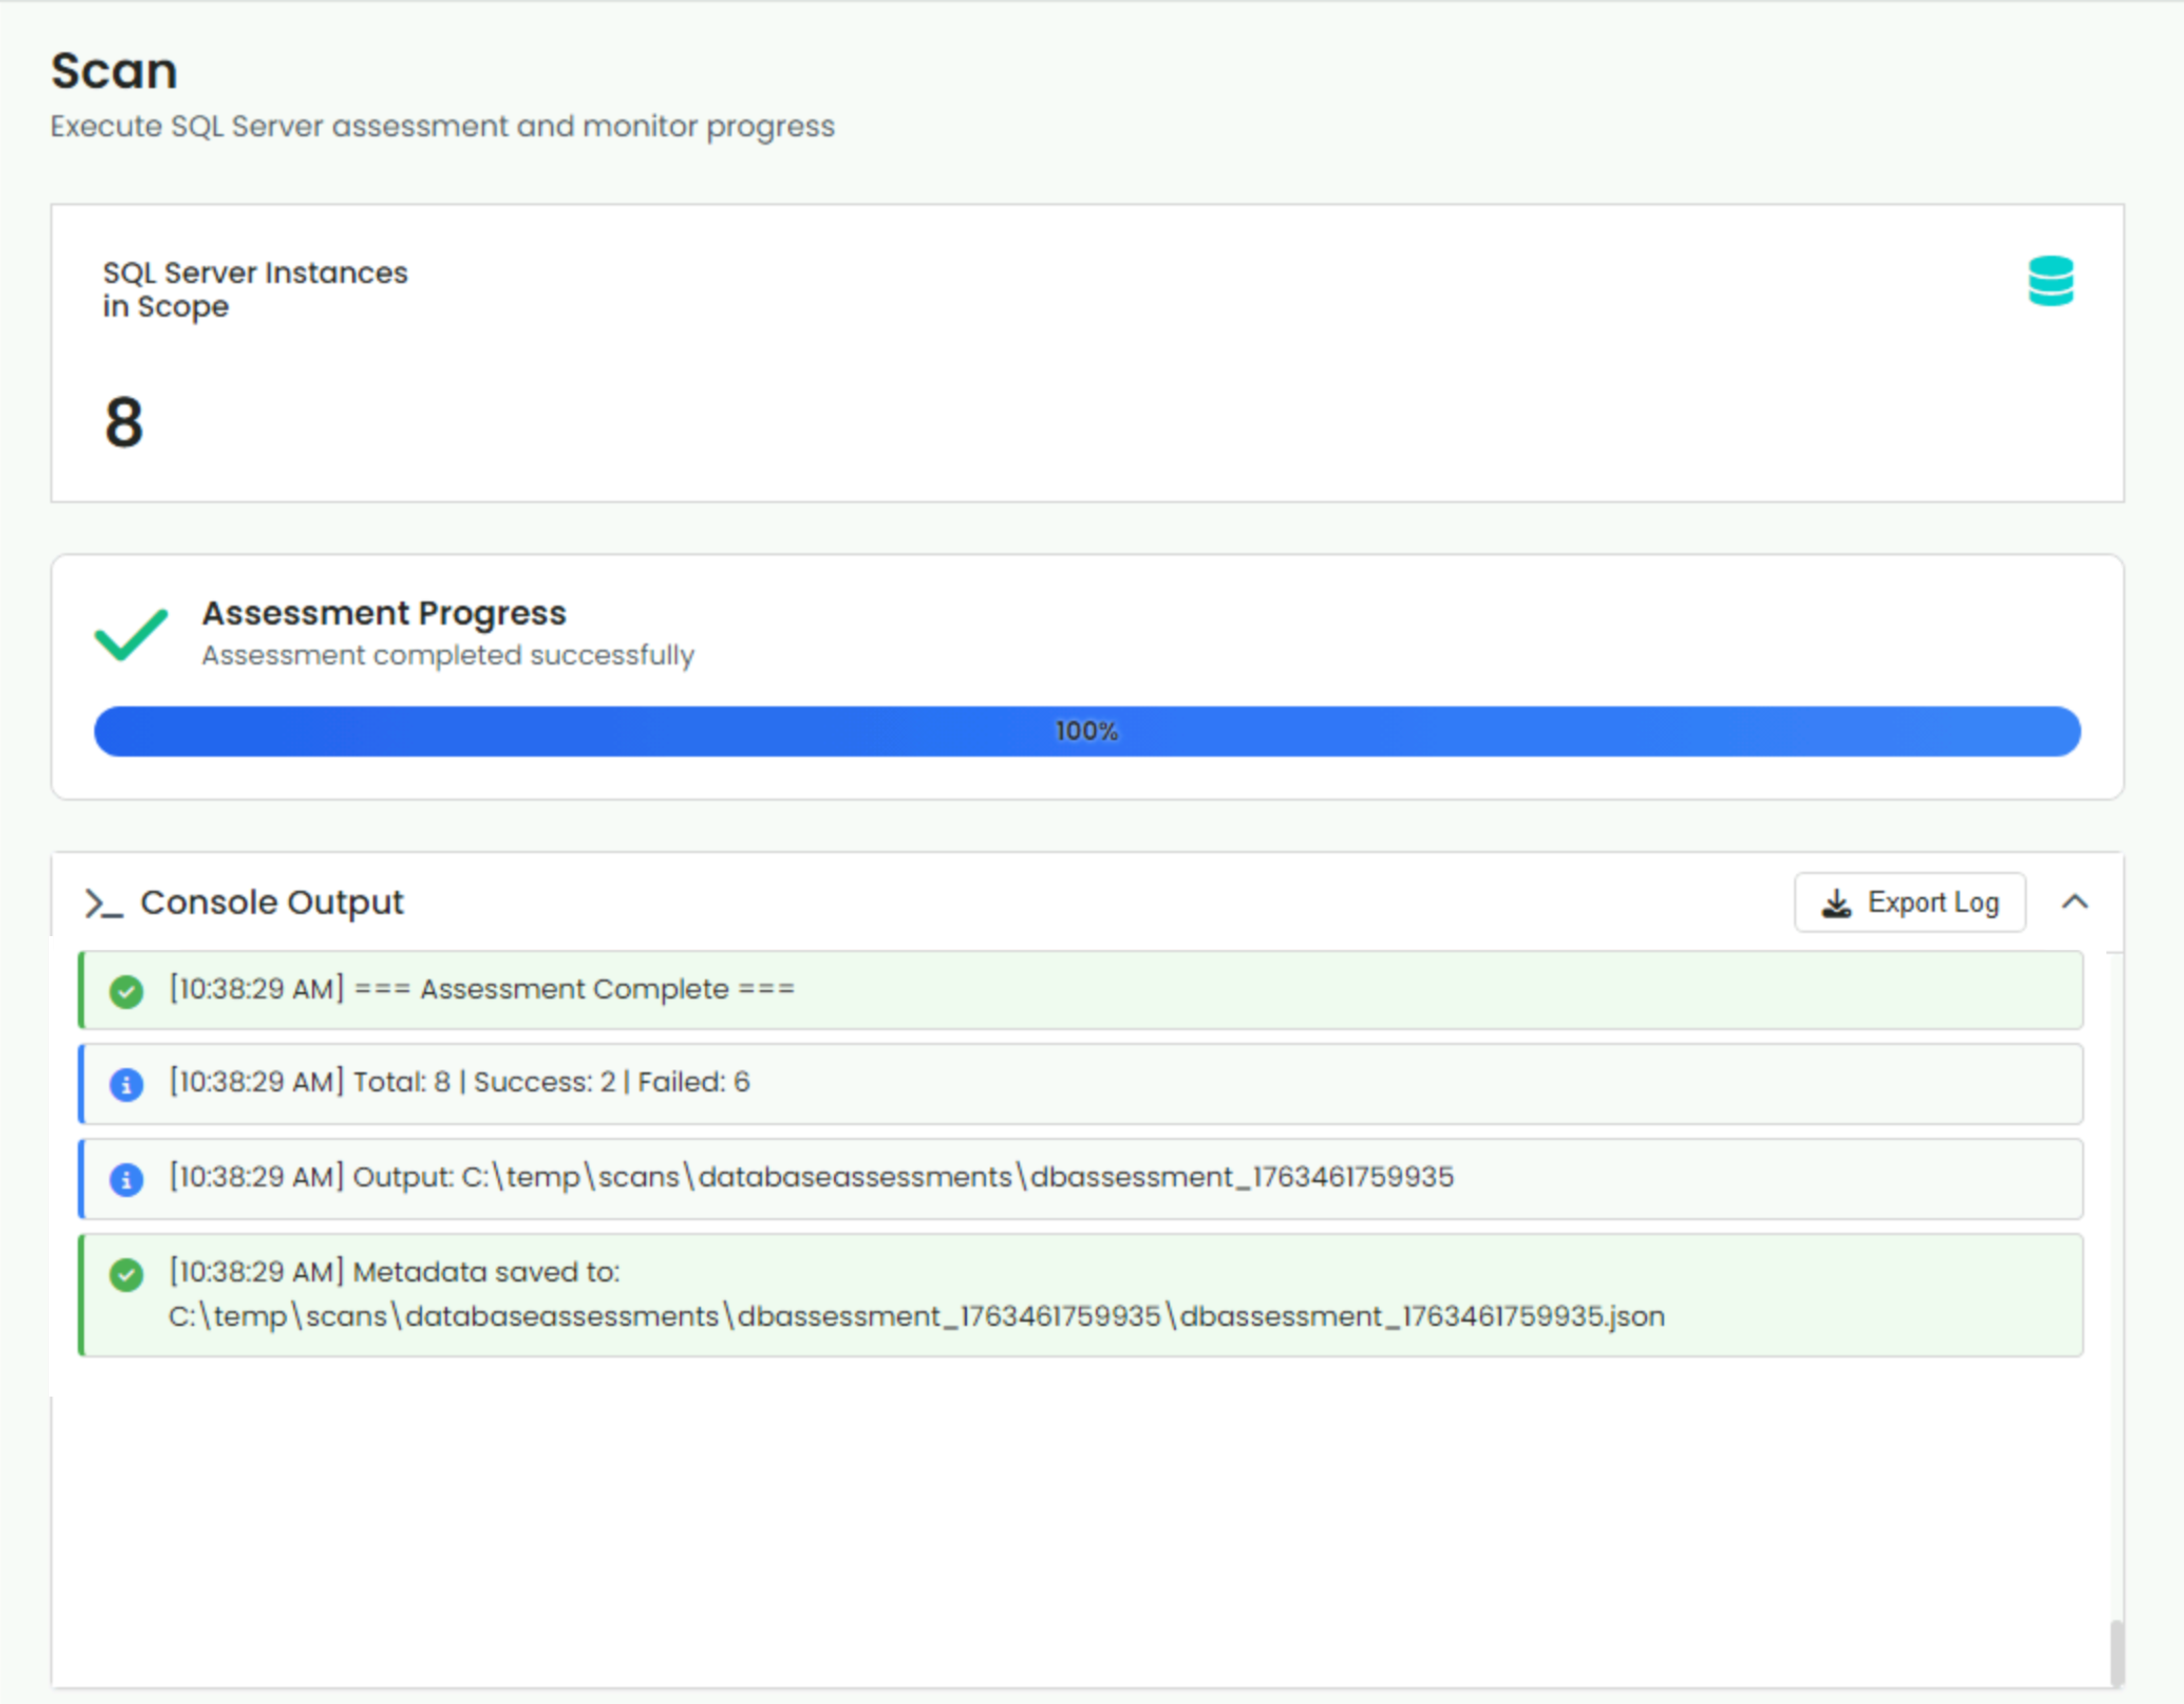
SQL Server Instances in Scope Card:
- A prominent card displays the total number of SQL Server instances ready for assessment
- This shows how many instances will be assessed in this scan session
- Example: “2” indicates two SQL Server instances are in scope
Console Output Section:
- The console output area displays real-time progress and status messages
- Initially empty before the scan starts
- Shows detailed information as the assessment progresses
- Includes an Export Log button to download the console output
Start Assessment
- Review the SQL Server Instances in Scope count to confirm the number of instances to be assessed
- Verify the output directory is correct (you can change it using the folder icon if needed)
- Click Run Scan button at the bottom right to begin the assessment
Monitor Progress
During the assessment, you can monitor progress in real time:
- Console Output - Displays detailed progress for each SQL Server instance as it’s assessed
- Status Updates - Shows which instance is currently being assessed and completion status
- Export Log - Click the Export Log button to download the console output at any time
What Happens During Assessment:
For each SQL Server instance:
- DMC connects to the SQL Server using the assigned credentials
- Gathers metadata about databases, objects, and configurations
- Assesses migration readiness for Azure SQL targets
- Identifies potential issues and blockers
- Generates a detailed assessment report
Assessment Duration:
- Small instances (< 10 databases): 1-2 minutes per instance
- Medium instances (10-50 databases): 2-5 minutes per instance
- Large instances (> 50 databases): 5-15 minutes per instance
Console Output
The console output provides detailed information about the assessment:
- Success messages - Show when an instance is assessed successfully
- Error messages - Display connection or assessment failures
- Progress updates - Show which instance is being processed
- Summary information - Total instances, successful assessments, and failures
You can export the console log by clicking Export Log.
Results
With the assessment completed, you can review results and access assessment reports.
Assessment Summary
The summary shows:
- Total Instances - Number of SQL Server instances assessed
- Successful - Instances that were assessed successfully
- Failed - Instances that failed assessment (with error details)
- Output Location - Directory where assessment reports are saved
Assessment Reports
Each SQL Server instance generates a detailed assessment report containing:
- Server Information - SQL Server version, edition, configuration
- Database Assessments - Detailed analysis of each database
- Migration Readiness - Compatibility assessment for Azure SQL targets
- Issues and Recommendations - Blocking issues and warnings
- Object Counts - Databases, tables, stored procedures, etc.
View Results in DMC
Click Show Results to view assessment results in the DMC Results page, where you can:
- See a summary of all assessments
- Filter by status (successful/failed)
- Access individual assessment reports
- View error details for failed assessments
Common Assessment Outcomes
Successful Assessment
When an assessment completes successfully, you’ll see:
- Green success indicator - Confirms the assessment completed without errors
- Assessment details - Shows number of issues found, objects assessed, and time taken
- Report file generated - Assessment report saved successfully
Failed Assessment
When an assessment fails, you’ll see:
- Red failure indicator - Indicates the assessment encountered an error
- Error details - Shows error type and description
Common error types:
- Connection failed - Network or firewall issues preventing access to SQL Server
- Verify ports 1433 (TCP) and 1434 (UDP) are open in your firewall
- Check that TCP/IP protocol is enabled on SQL Server
- Ensure SQL Server Browser service is running (for named instances)
- Test connectivity using
Test-NetConnection -ComputerName SERVERNAME -Port 1433 - Review firewall rules and network security group settings
- Authentication failed - Invalid credentials or authentication method mismatch
- Permission denied - Insufficient SQL Server permissions for the provided credentials
- SQL Server not accessible - Server is down, unreachable, or SQL Server service is not running
Next Steps
After reviewing assessment results:
- Download Troubleshooting Report - Download the offline troubleshooting report to review detailed assessment information and identify any issues
- Address Blocking Issues - Fix any critical issues identified in the assessment
- Re-assess as Required - Run assessment again after making changes to verify issues are resolved
- Upload Assessment Results - Upload your assessment results to Dr Migrate for further analysis and migration planning