Application Assessment with GitHub Integration
The Application Assessment feature allows you to assess Java and .NET applications using GitHub Copilot integration or by running AppCAT assessments manually. This helps you understand application readiness and suitability for Azure services like Azure App Service and Azure App Service Managed Instance.
Overview
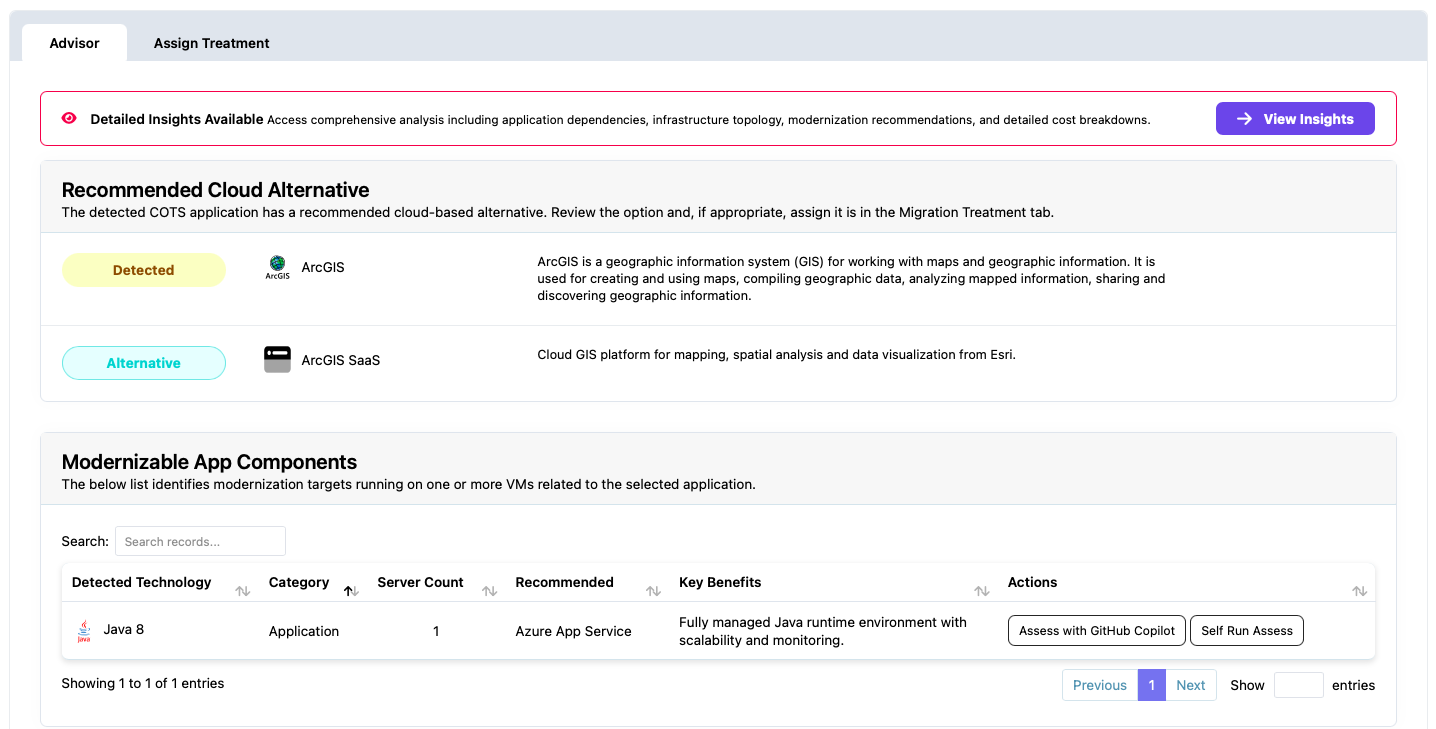
Application Assessment is available for applications that have Java or .NET (including ASP.NET) detected as a technology on one or more servers. The feature provides two assessment methods:
- Assess with copilot: Creates a GitHub issue and uses GitHub Copilot to automatically run the assessment
- Self run assess: Allows you to run AppCAT manually and upload results
Both methods provide the same assessment results, including readiness scores and suitability recommendations for Azure services.
Prerequisites
Before using Application Assessment, ensure you have:
- Applications with Java or .NET detected technology
- For “Assess with copilot”: GitHub account and repository configured (see GitHub Integration Setup)
- For “Self run assess”: Ability to run AppCAT locally or in your environment
Accessing Application Assessment
Navigate to the application you want to assess. Applications with Java or .NET detected technology will show assessment options under the 6R Treatments menu.

Assessment Methods
Assess with Copilot
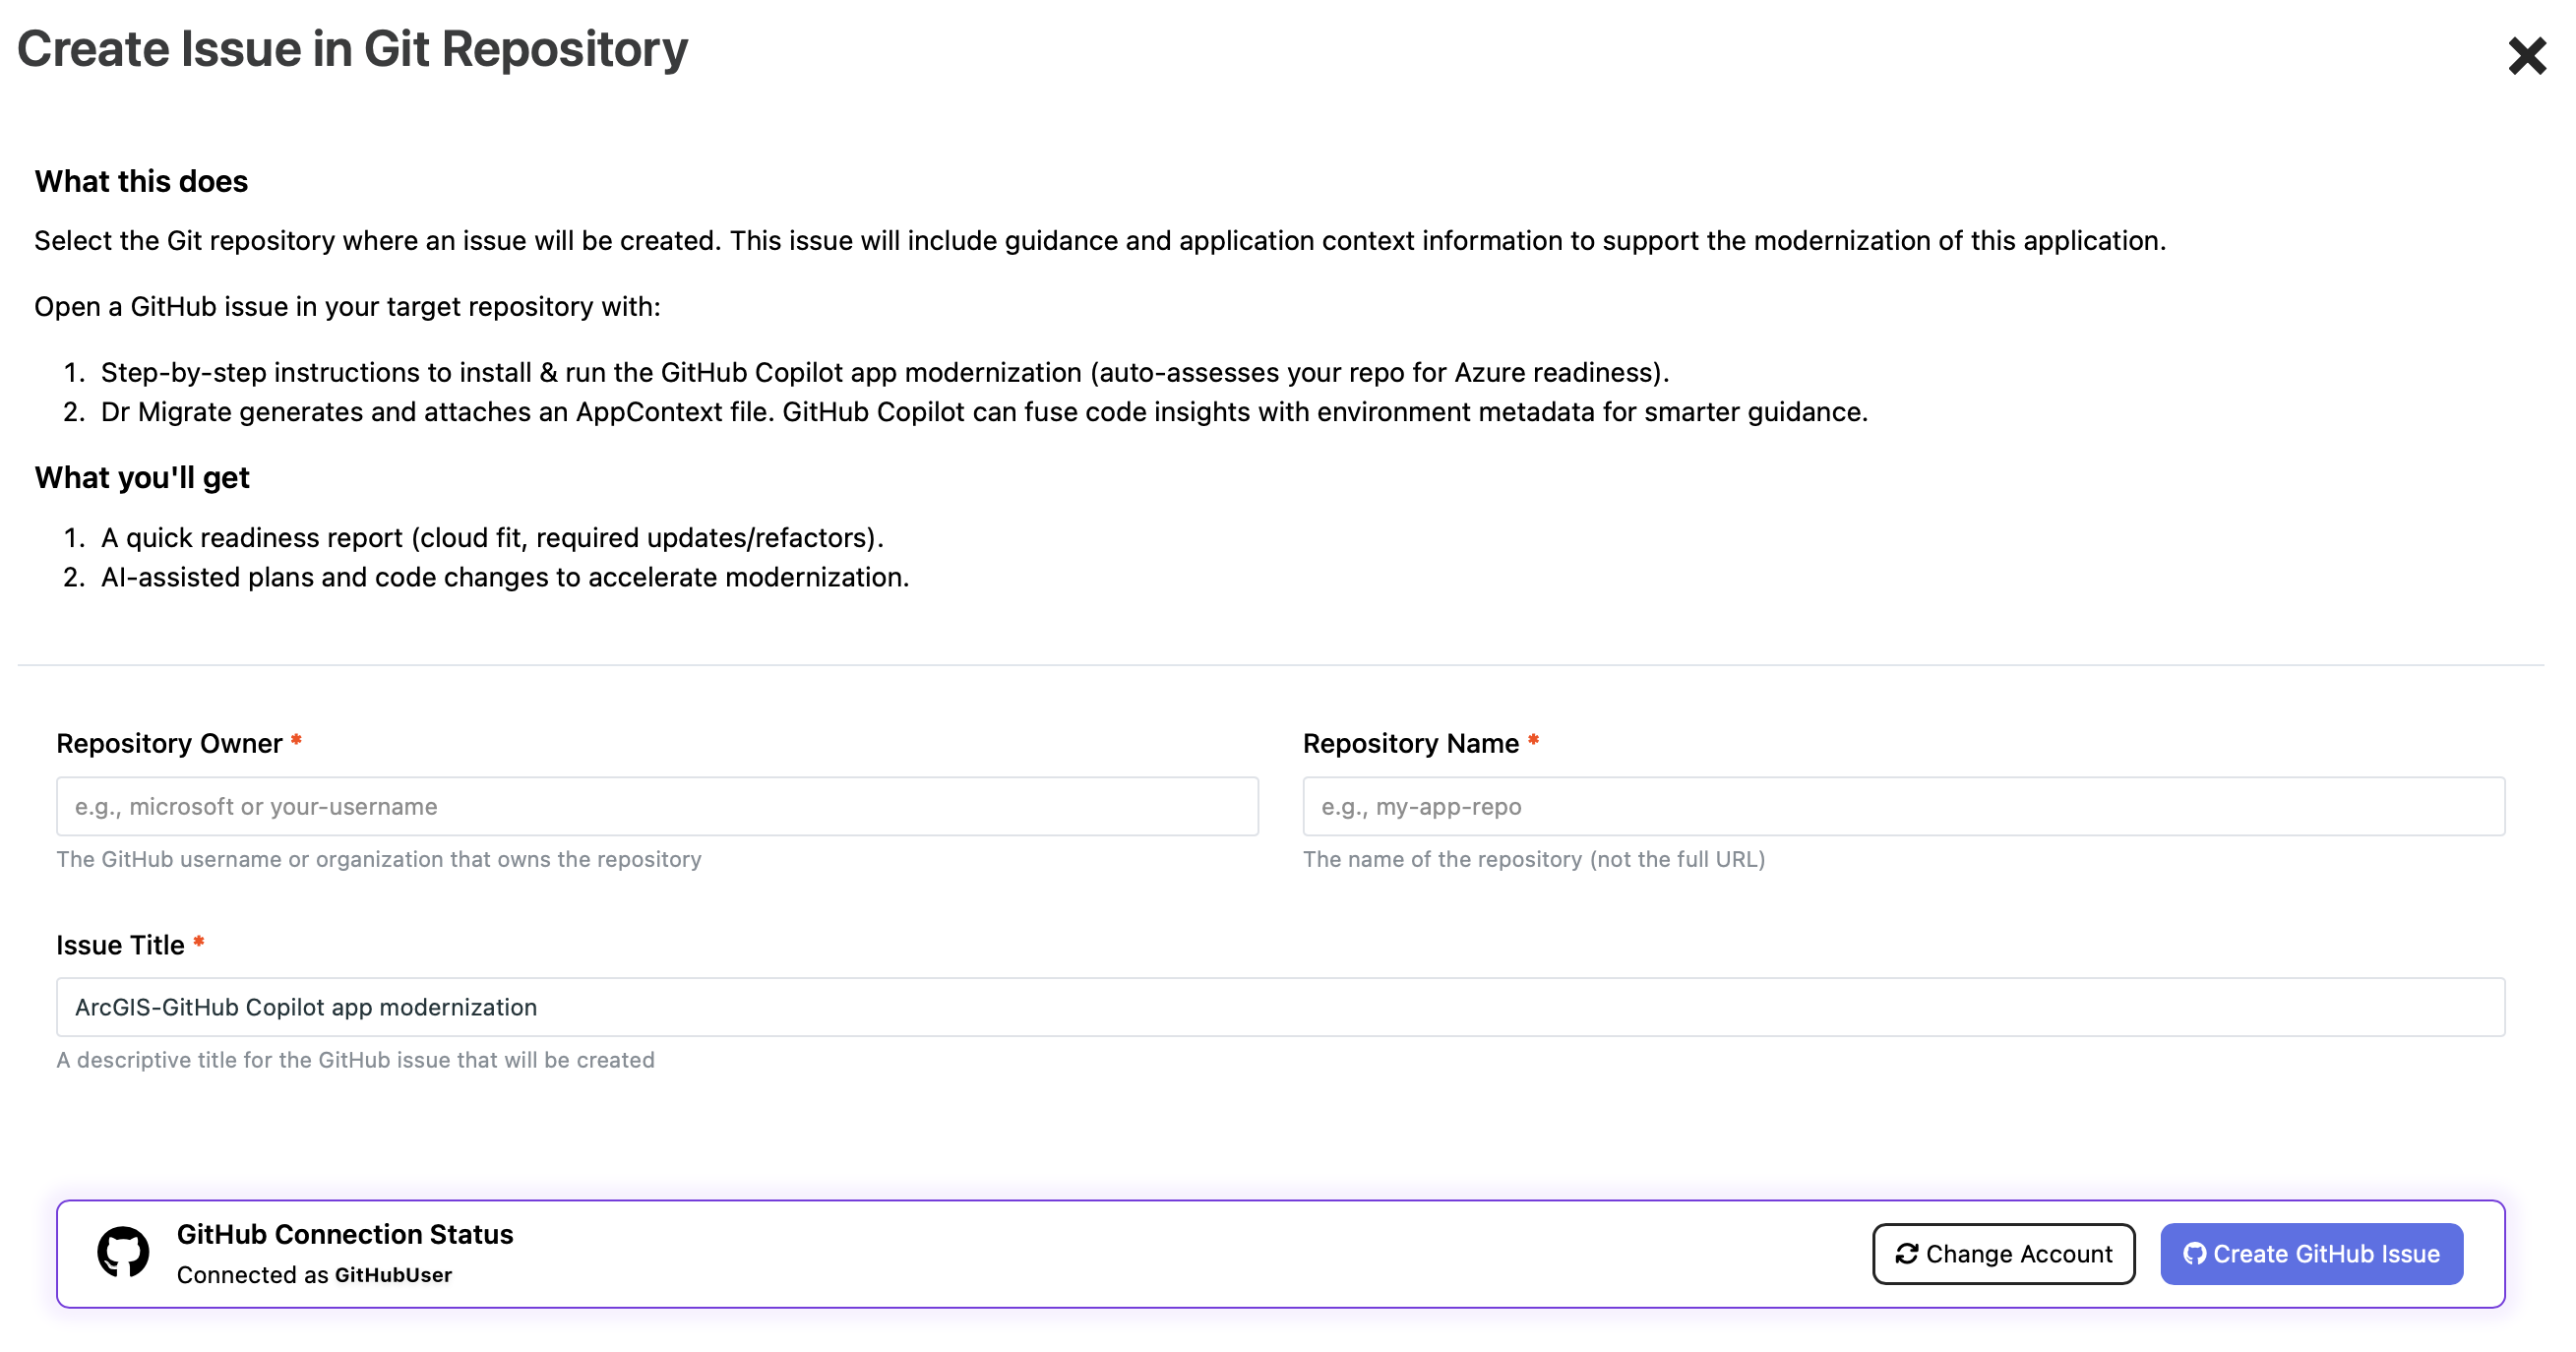
This option creates a GitHub issue automatically in your configured repository. You don’t need to install AppCAT locally—GitHub Copilot runs the assessment for you and generates the results file.
What Gets Created
When you select “Assess with copilot”, the following is created in your GitHub repository:
-
GitHub Issue: A new issue is created in your configured GitHub repository containing:
- Issue title identifying the application being assessed
- Instructions and guidance on using GitHub Copilot for the assessment
- Steps to complete the assessment process
-
Context File Attachment: A JSON file is automatically generated and attached to the issue at the moment the issue is created. The context file contains:
- Application overview: General information about the application
- Server overview: Details about servers associated with the application
The context file is generated at the time the GitHub issue is created to ensure it reflects the current state of the application. GitHub Copilot uses this context file to provide assessment recommendations based on your application’s current configuration.
Completing the Assessment
GitHub Copilot uses the context file attached to the issue to automatically run the AppCAT assessment. The GitHub issue contains instructions and guidance on how to interact with Copilot to complete the assessment process.
After Copilot completes the assessment, it generates a results file that you can optionally download and upload back to Dr Migrate for additional insights and planning purposes.
Self Run Assess
This option allows you to run AppCAT manually and upload the results back to Dr Migrate. Use this option if you prefer to run the assessment locally or have already completed an assessment.
Run AppCAT on your local machine or in your environment, then upload the results file to Dr Migrate using the upload interface.
For Java applications, refer to the Microsoft AppCAT 7 quickstart guide for detailed instructions on downloading, installing, and running AppCAT.
Uploading Assessment Results
After completing the assessment (either through Copilot or manually), you can upload the results file back to Dr Migrate. This brings the assessment data into Dr Migrate for planning purposes and provides additional insights beyond what Copilot shows.

Viewing Assessment Results
Once you have uploaded scan results or completed an assessment, you can view the results in Dr Migrate.
Access Results
Click View results to see the assessment outcomes for your application.

Understanding Results
The results display includes:
- Readiness Score: An overall score indicating how ready the application is for migration
- Suitability Assessment: Information about how suitable the application is for Azure App Service plans, Azure App Service Managed Instance, or other Azure services
- Recommendations: Specific guidance based on the assessment findings
- Assessment Status: Confirmation that you’ve completed the assessment and created the GitHub issue (if using Copilot)
- Learn More: Additional information and resources about the assessment results
Downloading or Updating Results
You can download the results file for reference or to share with your team. The results can also be updated if you need to re-run the assessment.
Next Steps
After reviewing assessment results:
- Use the readiness score and suitability assessment to inform your 6R treatment decisions
- Consider the recommendations when planning your migration approach
- Update your application treatment assignments based on the assessment findings
- Continue with Application Sizing and Wave Planning to complete your migration plan